
SAML Autoprovisioning
Autoprovisioning (also known as just-in-time provisioning) is provided as a convenience to large Glance customers. Customers who subscribe to Glance products offering autoprovisioning can skip the step of pre-provisioning each of their users who must use Glance. Instead, a Glance subscriber account is created on the fly the first time each user accesses the Glance product via SAML single signon.
Requirements
You must contact your Glance representative in order to activate autoprovisioning on your account.
Autoprovisioning only works for SAML-integrated customer accounts. Set up SAML access to Glance, and verify it is working correctly for Glance subscribers. When valid SAML Assertion documents are being presented to the Glance service, the autoprovisioning user interface uses them to help choose the appropriate attributes to use for new Glance subscribers.
Autoprovisioning requires certain identifying attributes to be provided by the customer's SAML single-signon identity provider. To autoprovision an account, Glance needs:
- An agreed-upon unique identifier for each new subscriber.
- A way to create a Glance Address from the user's profile information.
- Name, email, and telephone number attributes are helpful but not required.
Setting up Autoprovisioning
- Navigate to My Account, then to the SETTINGS tab, then scroll down to the Identity Provider Settings panel.
- Click on the link to Manage your single signon settings. The Single Signon Provisioning tab will be displayed.
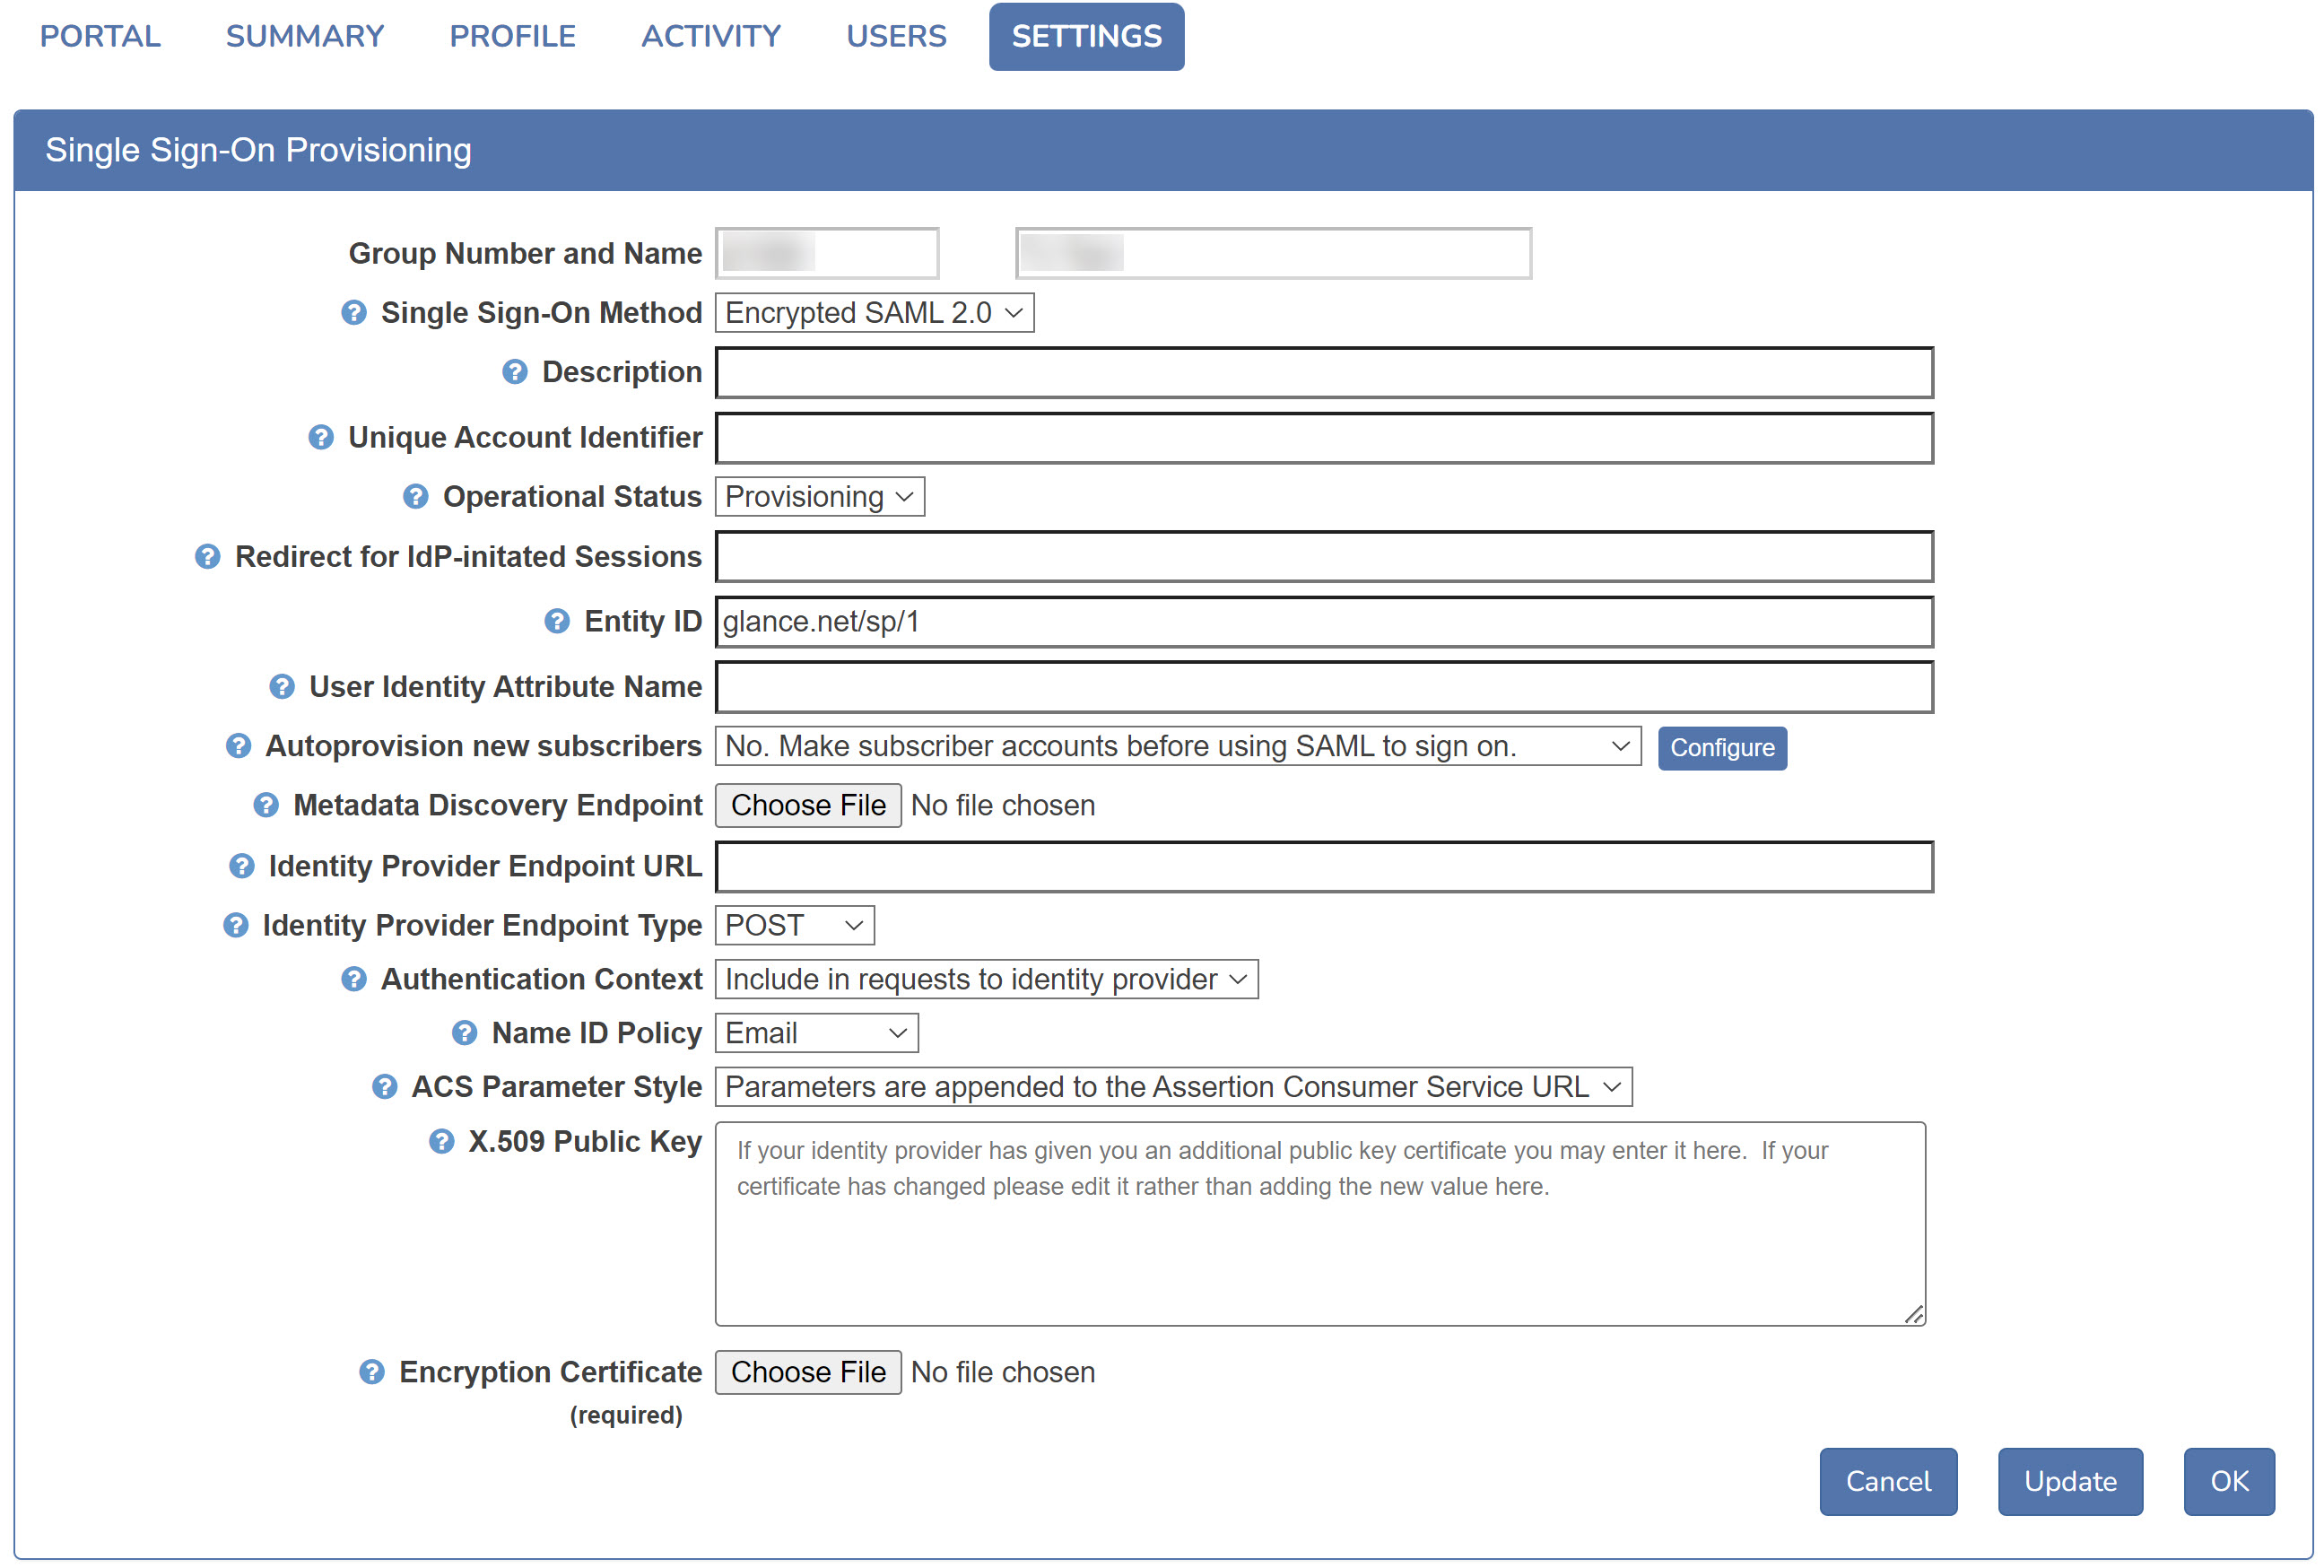
- Verify the Operational Status choice is set to Provisioning, not Production. When the operational status is set to provisioning, Glance captures all the attributes in recent SAML assertions.

NOTE: If Operational Status is set to Production, change it to Provisioning, press the OK button, and allow some time for subscribers to access Glance via SAML.
- Choose Yes in the Autoprovision new subscribers pulldown menu, and click the Update button.

Configuring Autoprovisioning
When Glance is integrated with your SAML enterprise single-signon solution, you can automatically create/provision a new Glance account for each new subscriber from your organization. This panel provides the information required to provision these accounts correctly.
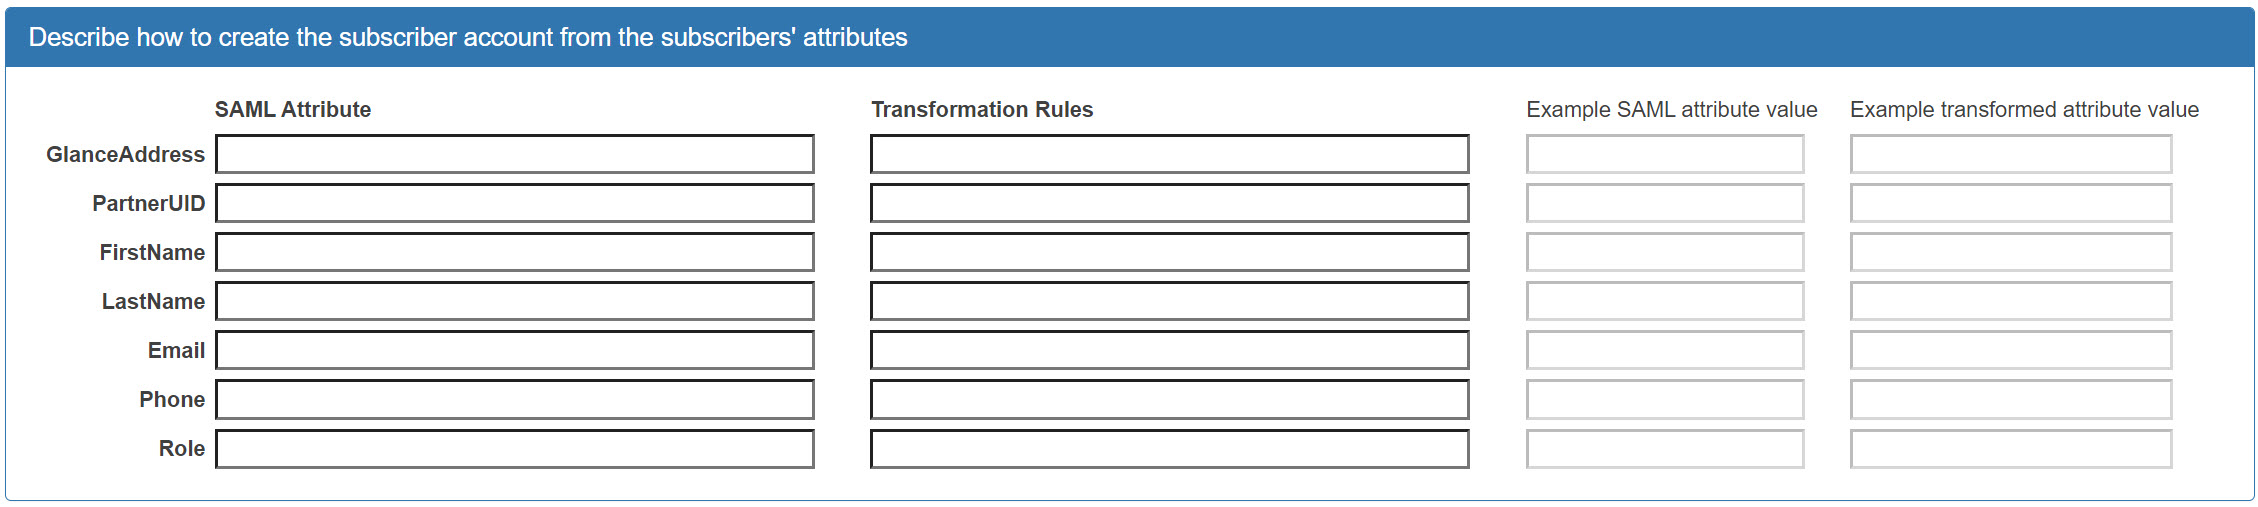
Glance identifies your subscribers with these attributes (items of data):
- GlanceAddress (required)
- PartnerUID
- FirstName
- LastName
- Phone
- Role
Most subscribers need a valid and unique PartnerUID. This can be an employee number or any other unique alphanumeric code assigned by your organization. It can be the same value as the GlanceAddress if you wish.
The other information (name, email, and phone number) is not required. It helps support and keep track of subscribers.
Your SAML enterprise single-signon solution is configured to present particular attributes of each user to Glance. This panel allows Glance to interpret those attributes correctly so we can provision new accounts for your subscribers.
- Click the Configure button by Autoprovision new subscribers to get to the configuration panel.

- Choose which SAML attributes to use for new Glance subscribers.
- Click in the text box next to GlanceAddress, then press the down-arrow key. You'll see an autocompletion menu populated from a recent SAML assertion.
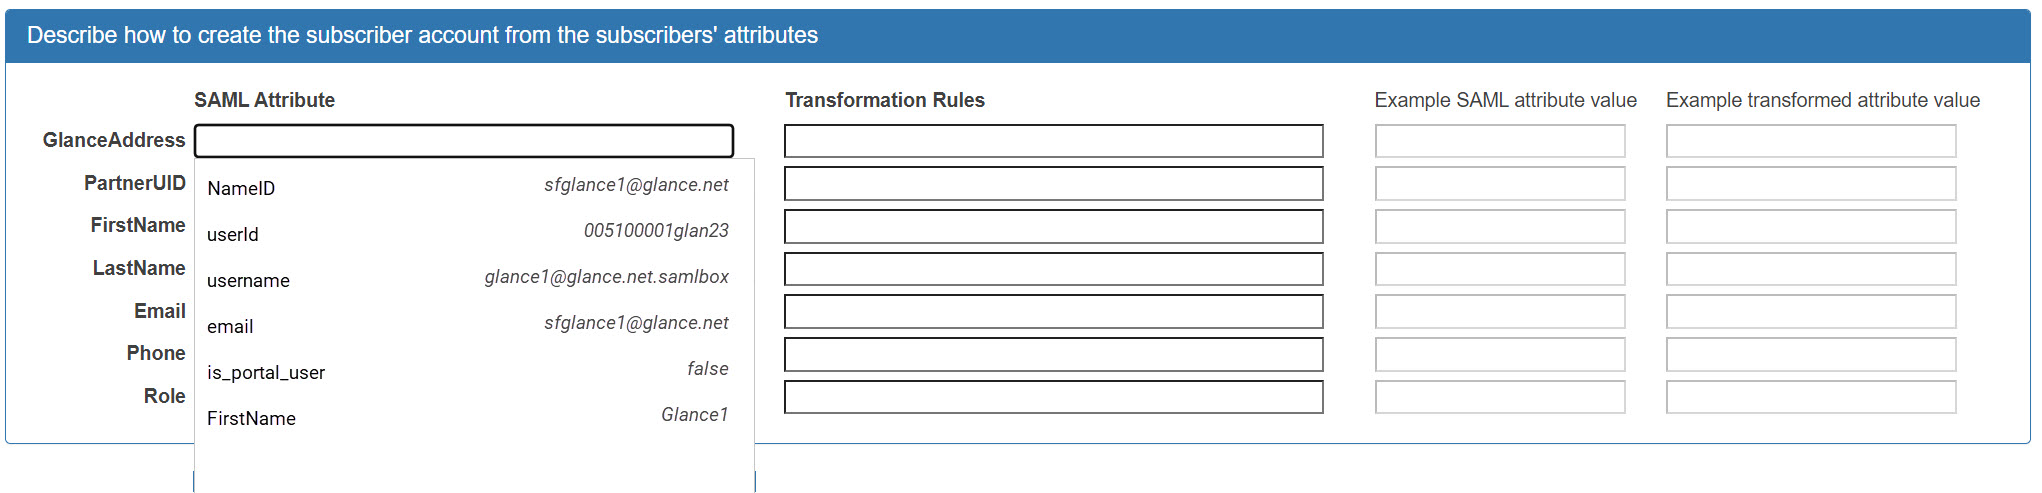
- Choose the name of an Attribute to use to create the Glance Address. The example values shown next to each attribute name should help you make the choice. In this case, the username attribute looks like it might uniquely identify the user.
- Click in the Transformation Rules box, then press the down-arrow key. You'll see an autocompletion menu populated with available transformation rules.
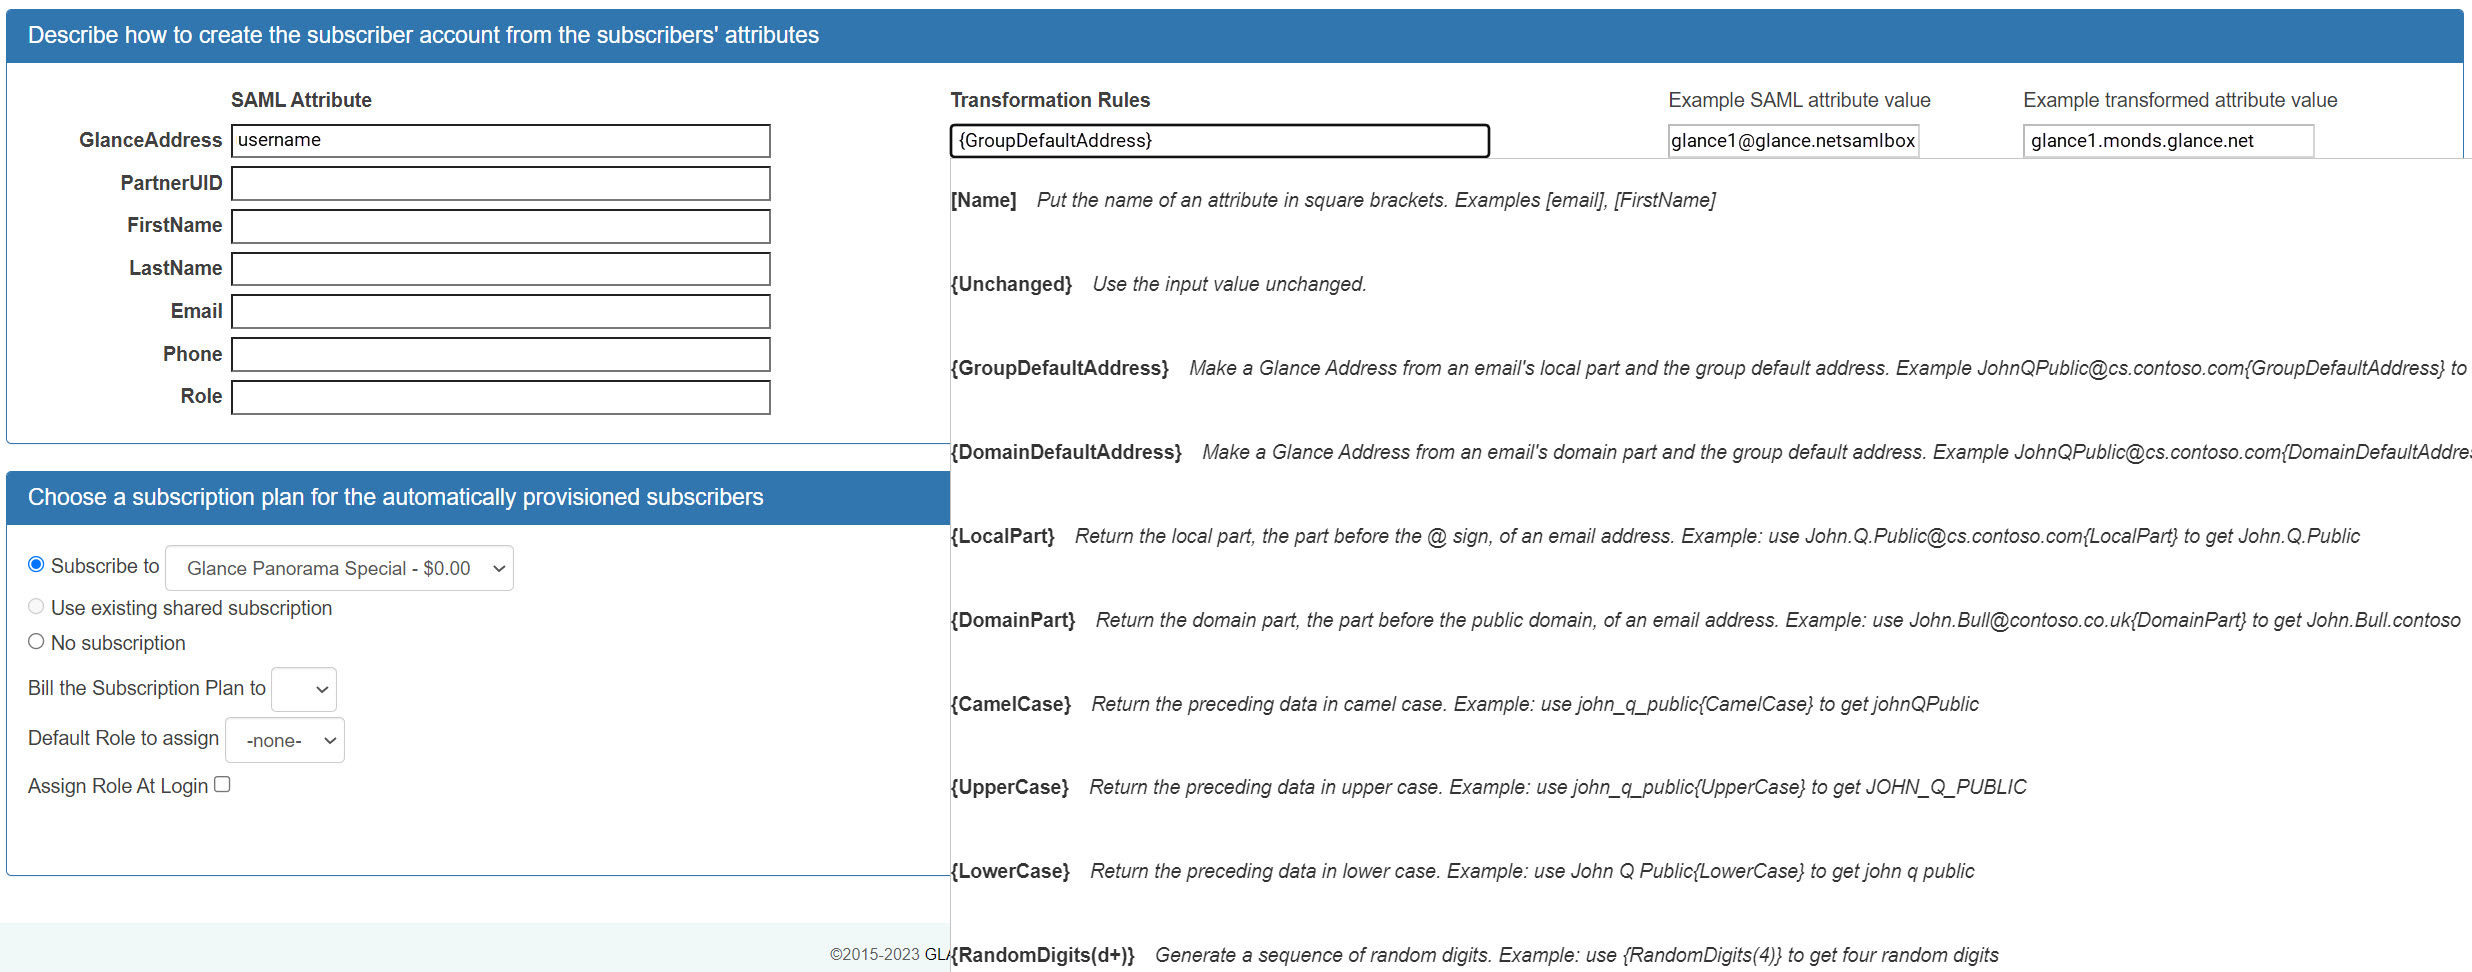
The following transformation rules are available:
| Rule | Explanation | Example |
| {GroupDefaultAddress} | Make a Glance Address from an email and the group default address. | JohnQPublic@example.com becomes JohnQPublic.example.glance.net |
| {DomainDefaultAddress} | Make a Glance Address from an email's domain part and the group default address. | JohnQPublic@cs.contoso.com becomes JohnQPublic.cs.contoso.example.glance.net |
| {LocalPart} | Return the local part, the part before the @ sign, of an email address. | John.Q.Public@example.com becomes John.Q.Public |
| {DomainPart} | Return the domain part, the part before the top-level domain, of an email address. | John.Bull@uk.example.org becomes John.Bull.uk.example |
| {UpperCase} | Return the preceding data in upper case. | john_q_public becomes JOHN_Q_PUBLIC |
| {LowerCase} | Return the preceding data in lower case. | John Q Public becomes \ john q public |
| {CamelCase} | Return the preceding data in camel case, eliminating hyphens and underscores. | john_q_public becomes \ johnQPublic |
| {RandomUppercase(n)} | Generate a sequence of random uppercase characters. | Use {RandomUppercase(12)} to get twelve characters. |
| {RandomDigits(n)} | Generate a sequence of random digits. | Use {RandomDigits(4)} to get four random digits. The generated number may contain leading zeros. |
| {Unchanged} | Use the input value unchanged. |
NOTE: Specifying no transformation rule uses the attribute unchanged.
In this example {GroupDefaultAddress} is used, it converts the value glance1@glance.net.samlbox (a username on the SAML system in this example) into glance1.monds.glance.net (a value based on this account's defaults.)
NOTE: It's possible to type a combination of transformation rules and ordinary text in the box. For example, you could type {LocalPart}.support.monds.glance.net. This would result in the example value glance1.support.monds.glance.net.
You may specify SAML Attributes and Transformation Rules for all six items in this panel. You must specify them for the Glance Address, and it's helpful to specify them for partnerUID.
- Configure either Glance Address, PartnerUID, or Email to use an attribute that appears unchanged as one of the attributes in the SAML assertions. The attribute must uniquely identify the subscriber. In this example (in which the SAML Identity Provider happens to be a Salesforce.com instance), we choose the subscriber's userId to be the PartnerUID, as follows:

- Navigate back to the main Single Sign-On Provisioning tab, set the **User Identity Attribute Name **to that same attribute.

- Navigate back to the Configuration page and scroll down to the Choose a subscription plan for the automatically provisioned subscribers section.
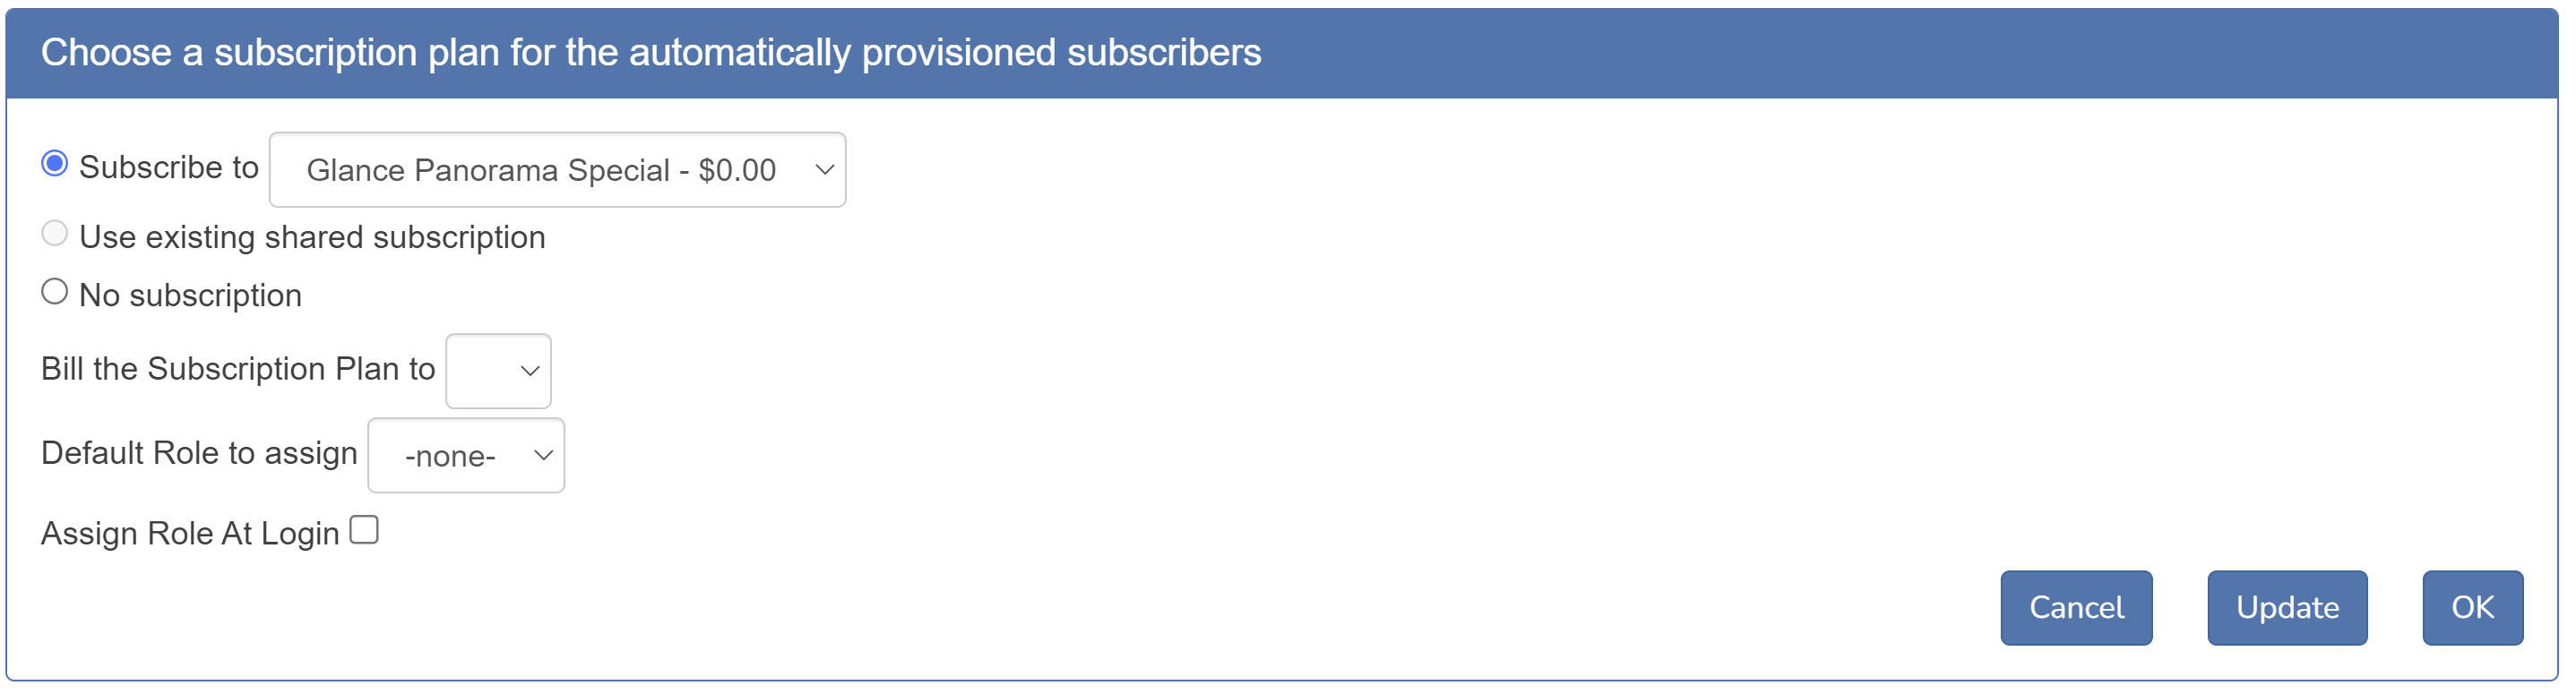
- Select the subscription and billing person to be assigned to automatically provisioned accounts.
- Select the Default Role to assign. When an account is created, the role will be assigned based on the rules for the Role attribute configured in step 5. The Default Role is used during the following scenarios:
- You have not configured a rule for the Role in step 5.
- You have configured a rule for Role in step 5 and the assertion contains the attribute specified in the table, but the value included in the assertion does not match an existing Role for the group.
- Assign Role At Login - If checked, a user's role will be updated to the value specified in their SAML assertion upon each successful authentication, prior to joining the session.
- Note that the value in the SAML assertion must match an existing role for the group. Otherwise, the user's role will be updated to the Default value specified in step 10.
- Role is the only user attribute that can be automatically updated based on SAML assertion attributes during subsequent logins.
That completes the configuring autoprovisioning for your account.
Finishing Provisioning
Once the SAML provisioning is complete for the account, you should give it a few days to stabilize. Visit the Access Log to observe activity including SAML logins and new subscriber autoprovisioning events. You can see the Access Log via a link on the ACTIVITY tab on My Account.
- When production is known to be stable, navigate back to the Single Sign-On Provisioning tab.
- Set the Operational Status to Production.
NOTE: Sign-on and autoprovisioning events take slightly less time when the status is Production.
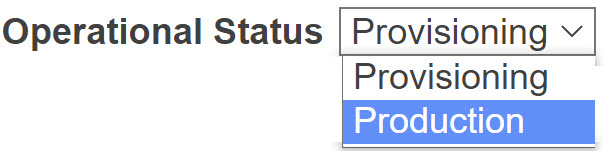
- Click the OK button when changes are complete.