
Adding Glance Buttons to Salesforce Records
The Glance Show and View buttons can be used from most objects in Salesforce. The Cobrowse/Join button can only be used from a Lead, Contact, or Case. These buttons are added by putting a small Visualforce page on each Lightning Record or Page Layout.
You can put the button on a quick action as well, but the button is so small that it is usually easier for agents to reach if it's a part of the page.
Add the Glance Buttons to Lightning Records

NOTE: The Glance buttons are only available to use on standard objects. The Cobrowse/Join button is only available on Contacts, Cases and Leads.
To add the Glance buttons in Lightning:
- Open the app from the App Launcher that will be used by your Glance users, such as the Service Console.
- Navigate to a record type that you want to add Glance to, like a Contact or Case.
- Click the Gear icon in the top right corner and choose Edit Page.
- On the left sidebar, click and drag Visualforce over onto the console wherever you want Glance to be placed. (It is recommended that it's placed high enough so the agent doesn't have to scroll down to get to it.)
- On the right sidebar, under Label, enter Glance.
- Under Height, enter 40.
- Click Save.
- If prompted, click Activate.
- You might be prompted to assign the record page.
- After you assign the record page, click Save.
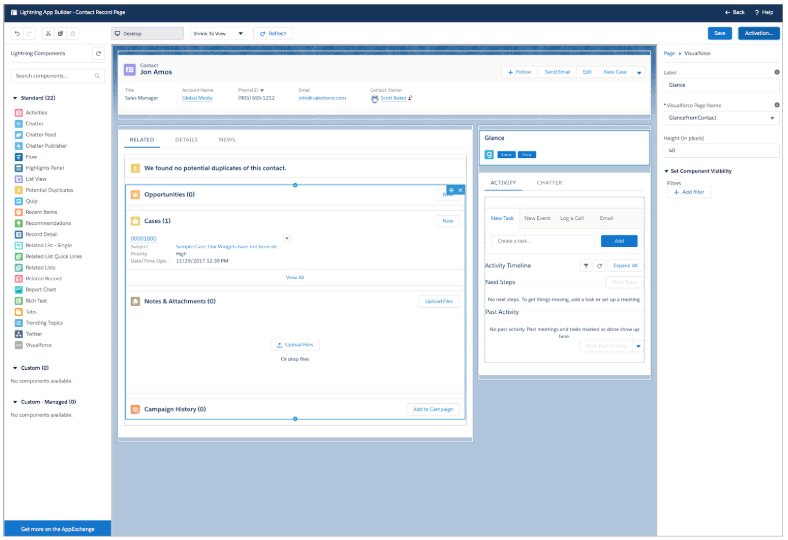
- In the top right corner, click Back.
- Repeat steps 3 to 11 from a Case object if you want to use Glance from there as well.
Example:
Add the Glance Buttons to Page Layouts in Salesforce Classic
NOTE: Adding these to Classic will also make the buttons appear on the Details of a record in Salesforce Lightning.
You can add Glance buttons to the following objects in Salesforce Classic. The asterisk * indicates which objects may use Cobrowse:
- Account
- Campaign
- Case*
- Contact*
- Event
- Lead*
- Opportunity
NOTE: Glance buttons are not supported on custom objects.
Follow these steps to add a Glance button to standard objects you will be using with Glance. This example uses Lead layouts.
-
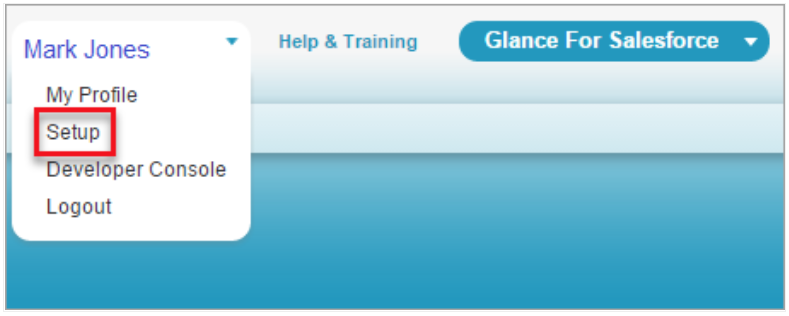
On the top-right of your Glance for Salesforce app, click on your Username.
-
Select Setup from the drop-down menu.
-
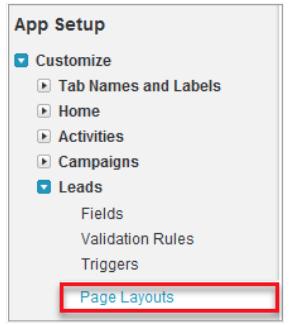
Locate the App Setup menu located on the left-hand panel of the page.
-
Select Customize.
-
Choose Leads.
-
Click on Page Layouts.
-
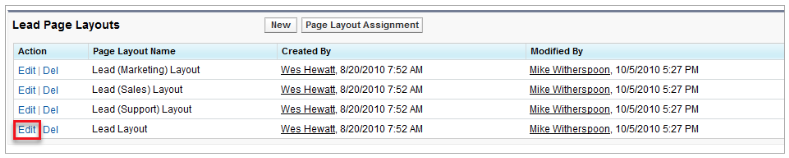
Select the Edit link in the row Lead Layout.

NOTE: After creating your page layouts, click the Page Layout Assignment button to control which page layout users see by default.
- At the top of the page, you should now see the Lead Layout section.
- Select the Visualforce Pages layout option located in the left-hand panel.
- From the right-hand panel of Lead Layout, click on GlanceFromLead.
- Drag the GlanceFromLead to the Lead Detail section.
NOTE: We recommend placing GlanceFromLead at the top of the right-hand column of the Lead Detail section.
-
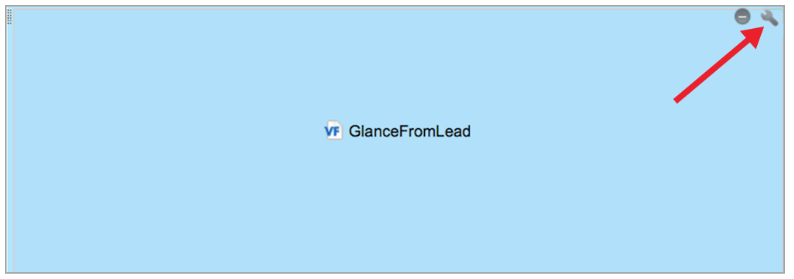
Point to the GlanceFromLead box and click on the wrench icon.
-
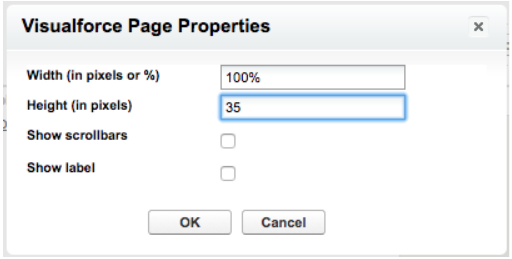
In the Visual Page Properties pop-up window, change the Height from 200 to 35 pixels.
-
Click OK.
-
Scroll back up the page and find the Lead Layout section.
-
Click on Save.
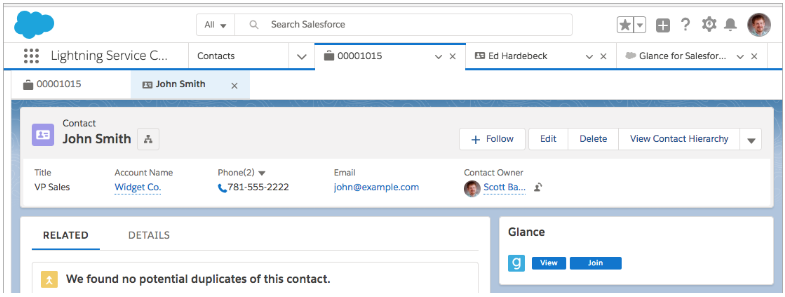
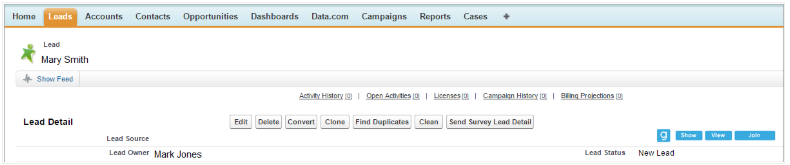
Below is an example of the Show, View, and Join buttons added to a Lead object:
- Choose Event Layout.
- From the top palette, click Fields on the left.
- On the right, click +Section and drag it under the Calendar Details section.
- The Section Properties box will appear.
- Under Section Name, type Glance Session Details.