Navigation Assist
Requires CB 5.8 or higher
Glance now allows the agent to navigate to a URL on the visitor's behalf by clicking on a bookmark within the agent viewer. The URL that the agent directs the visitor to must contain the Cobrowse script tag in order for the agent to follow along. The admin can designate which websites will be available for navigation assist through the Account Management site.
Enable Navigation Assist
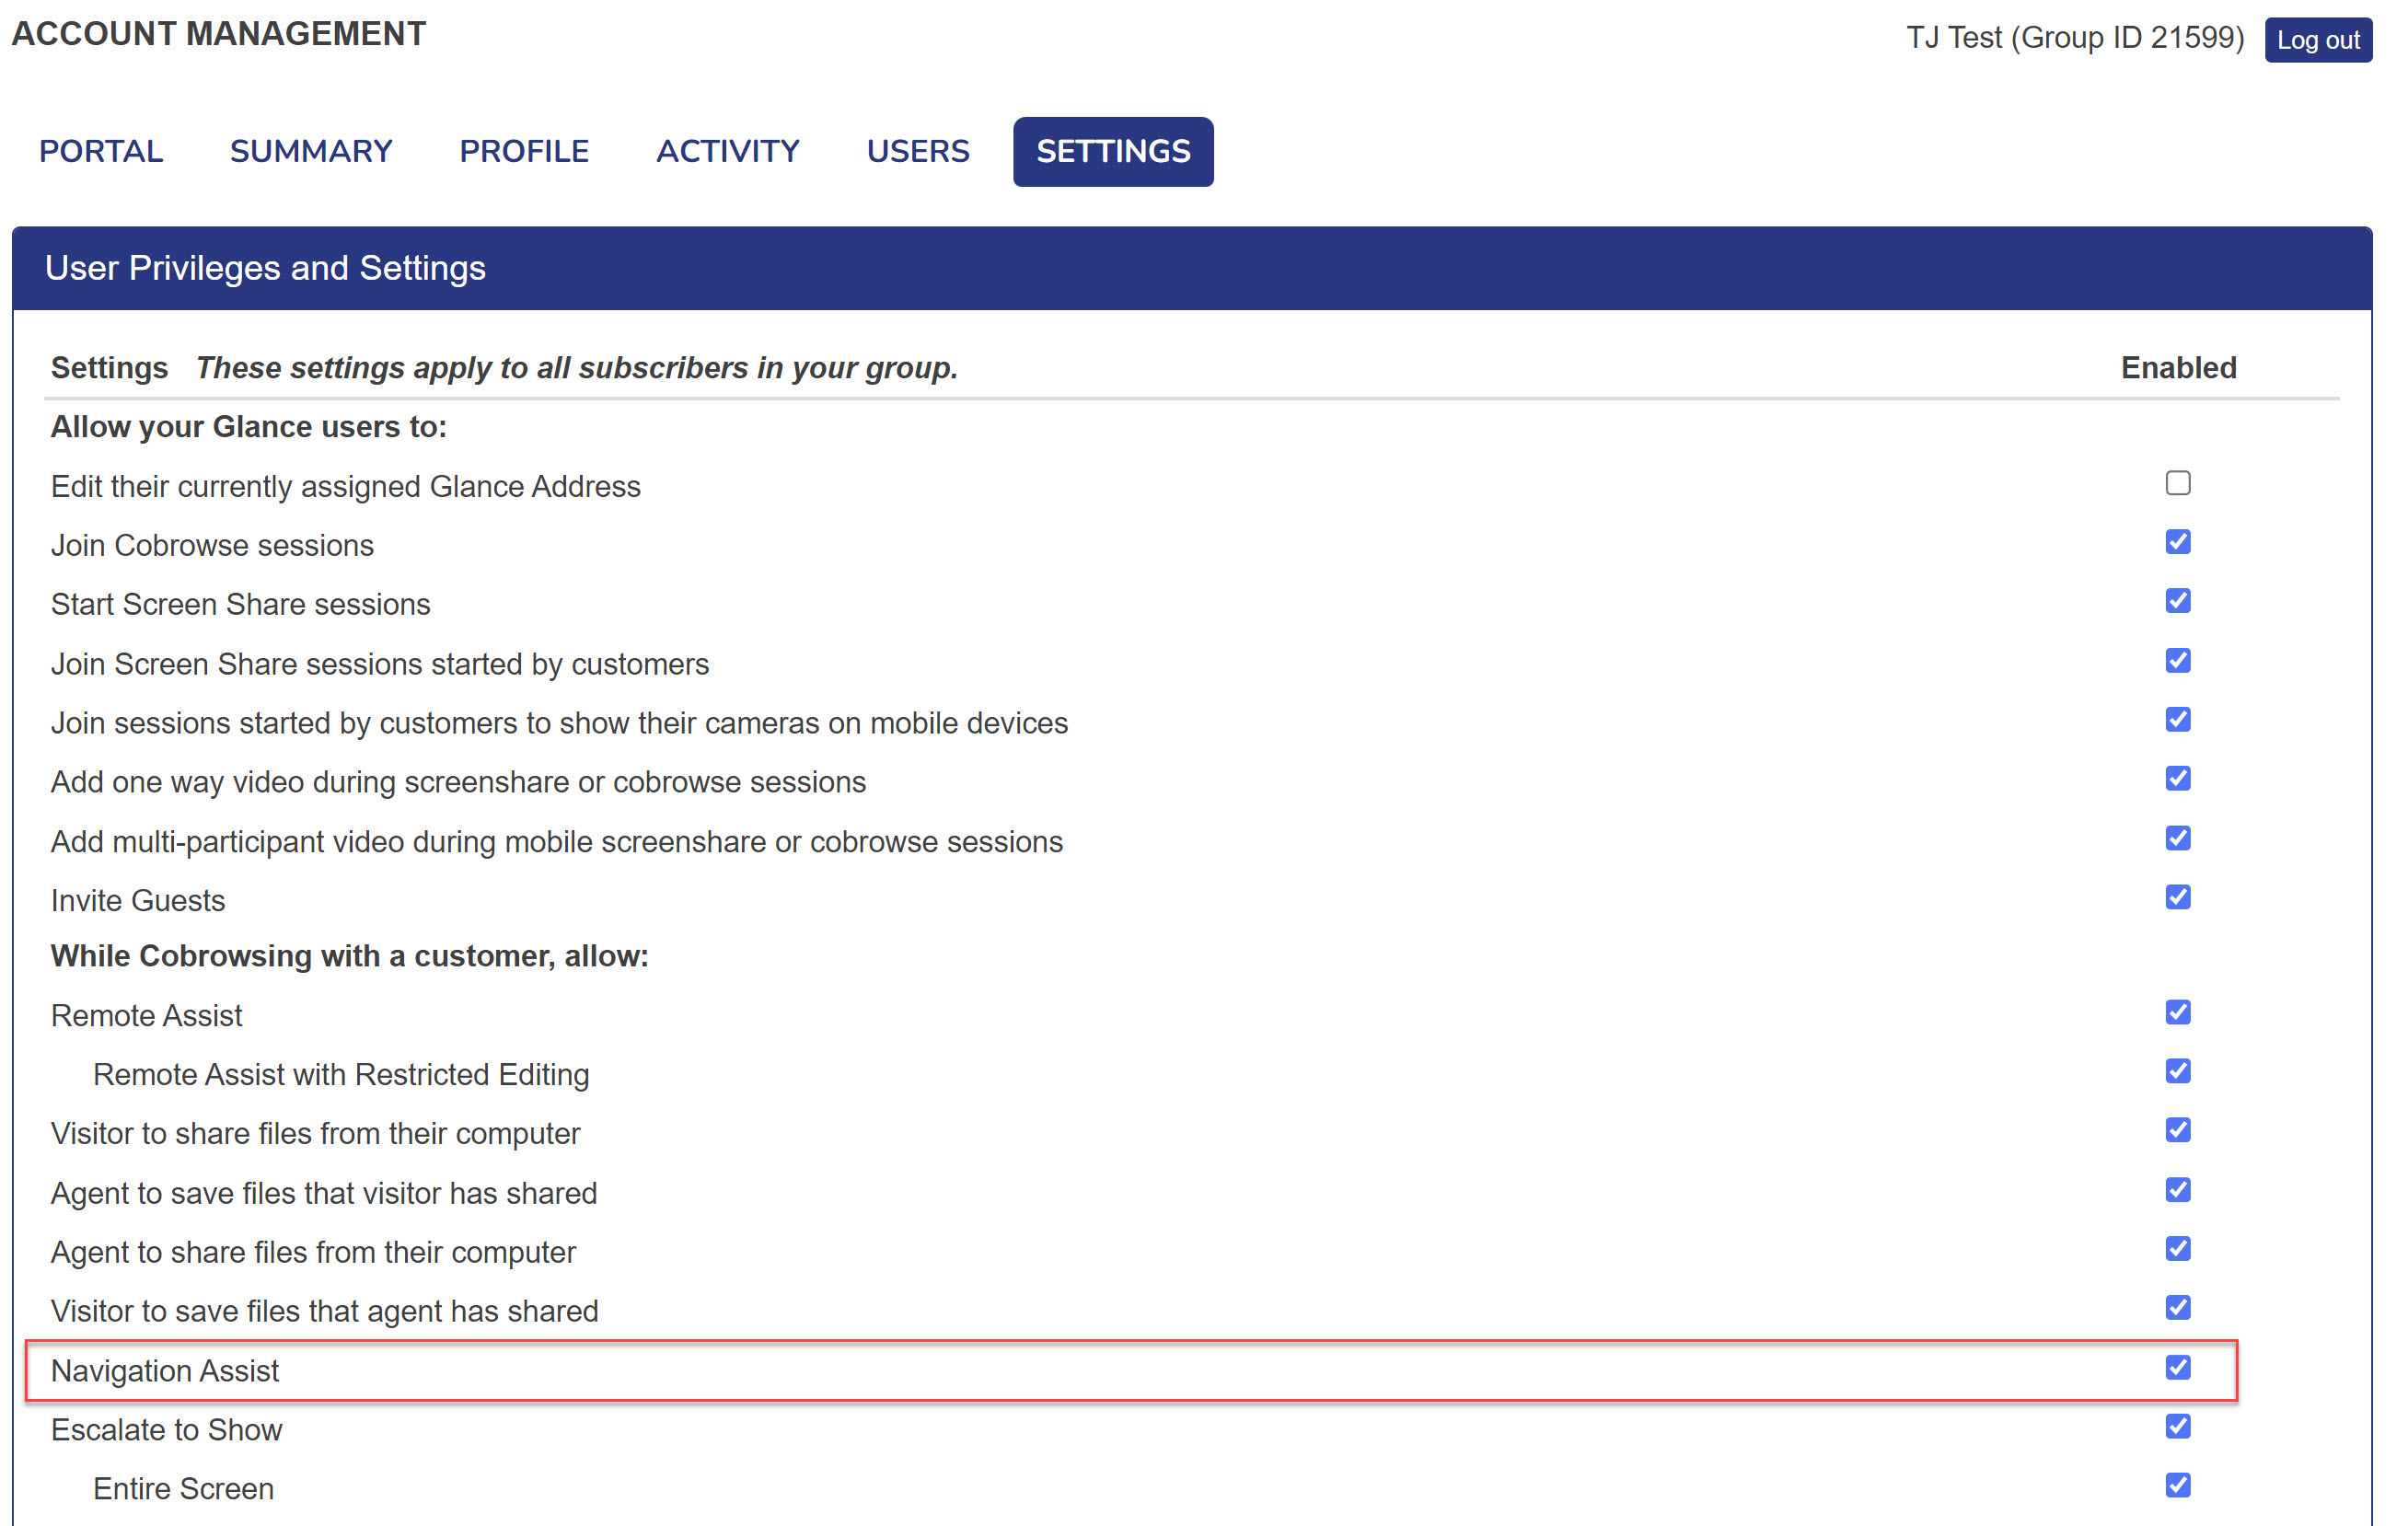
- Navigate to Account Management and select the Settings tab.
- Click the Enabled checkbox next to Navigation Assist.

NOTE: If you have Roles setup within your group, you will need to enable Navigation Assist within Role Settings found in the Portal tab.
- Scroll down to the Cobrowse Settings section and click Manage your cobrowse settings.
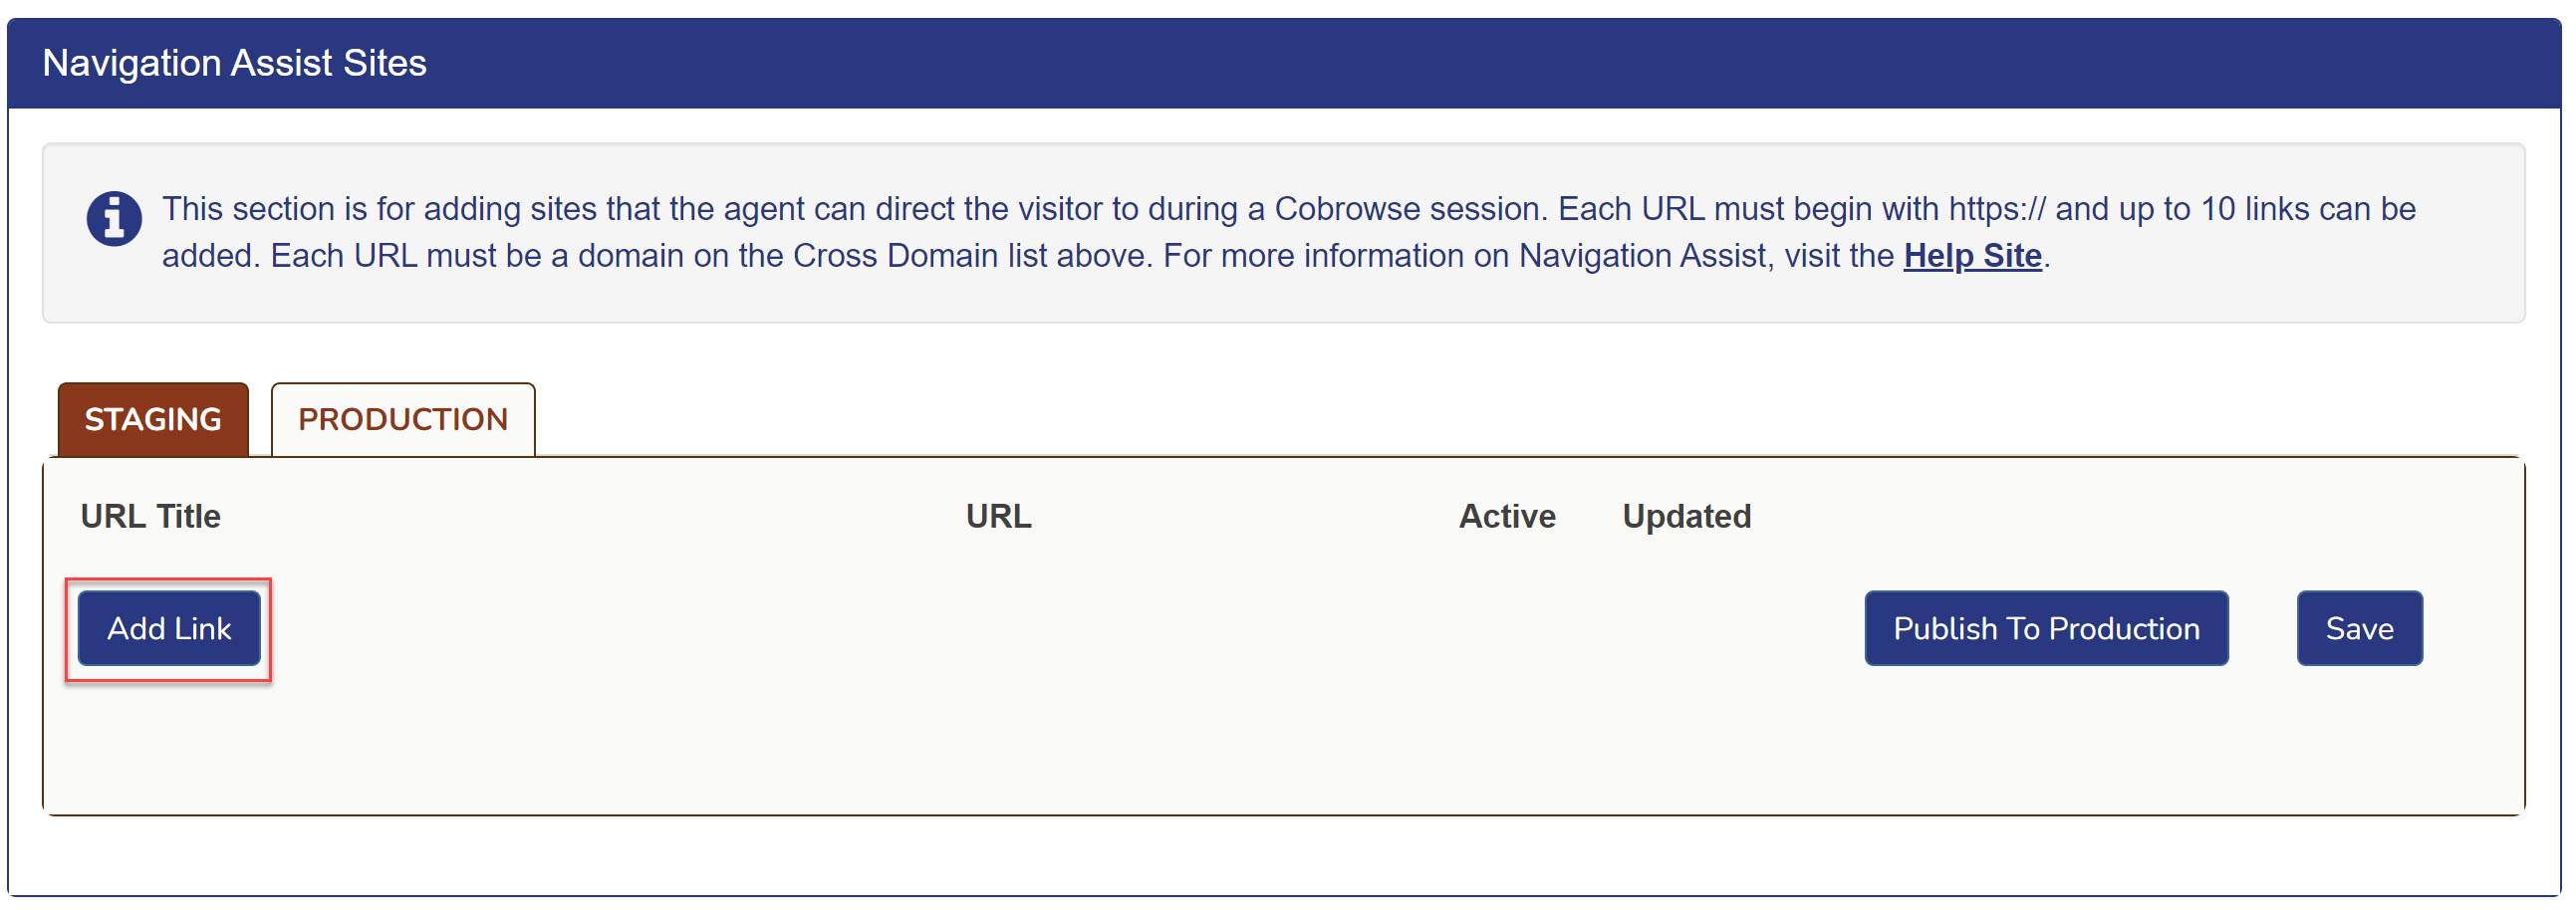
- Scroll down to the Navigation Assist Sites section and click Add Link to add a site to be used for navigation assist.

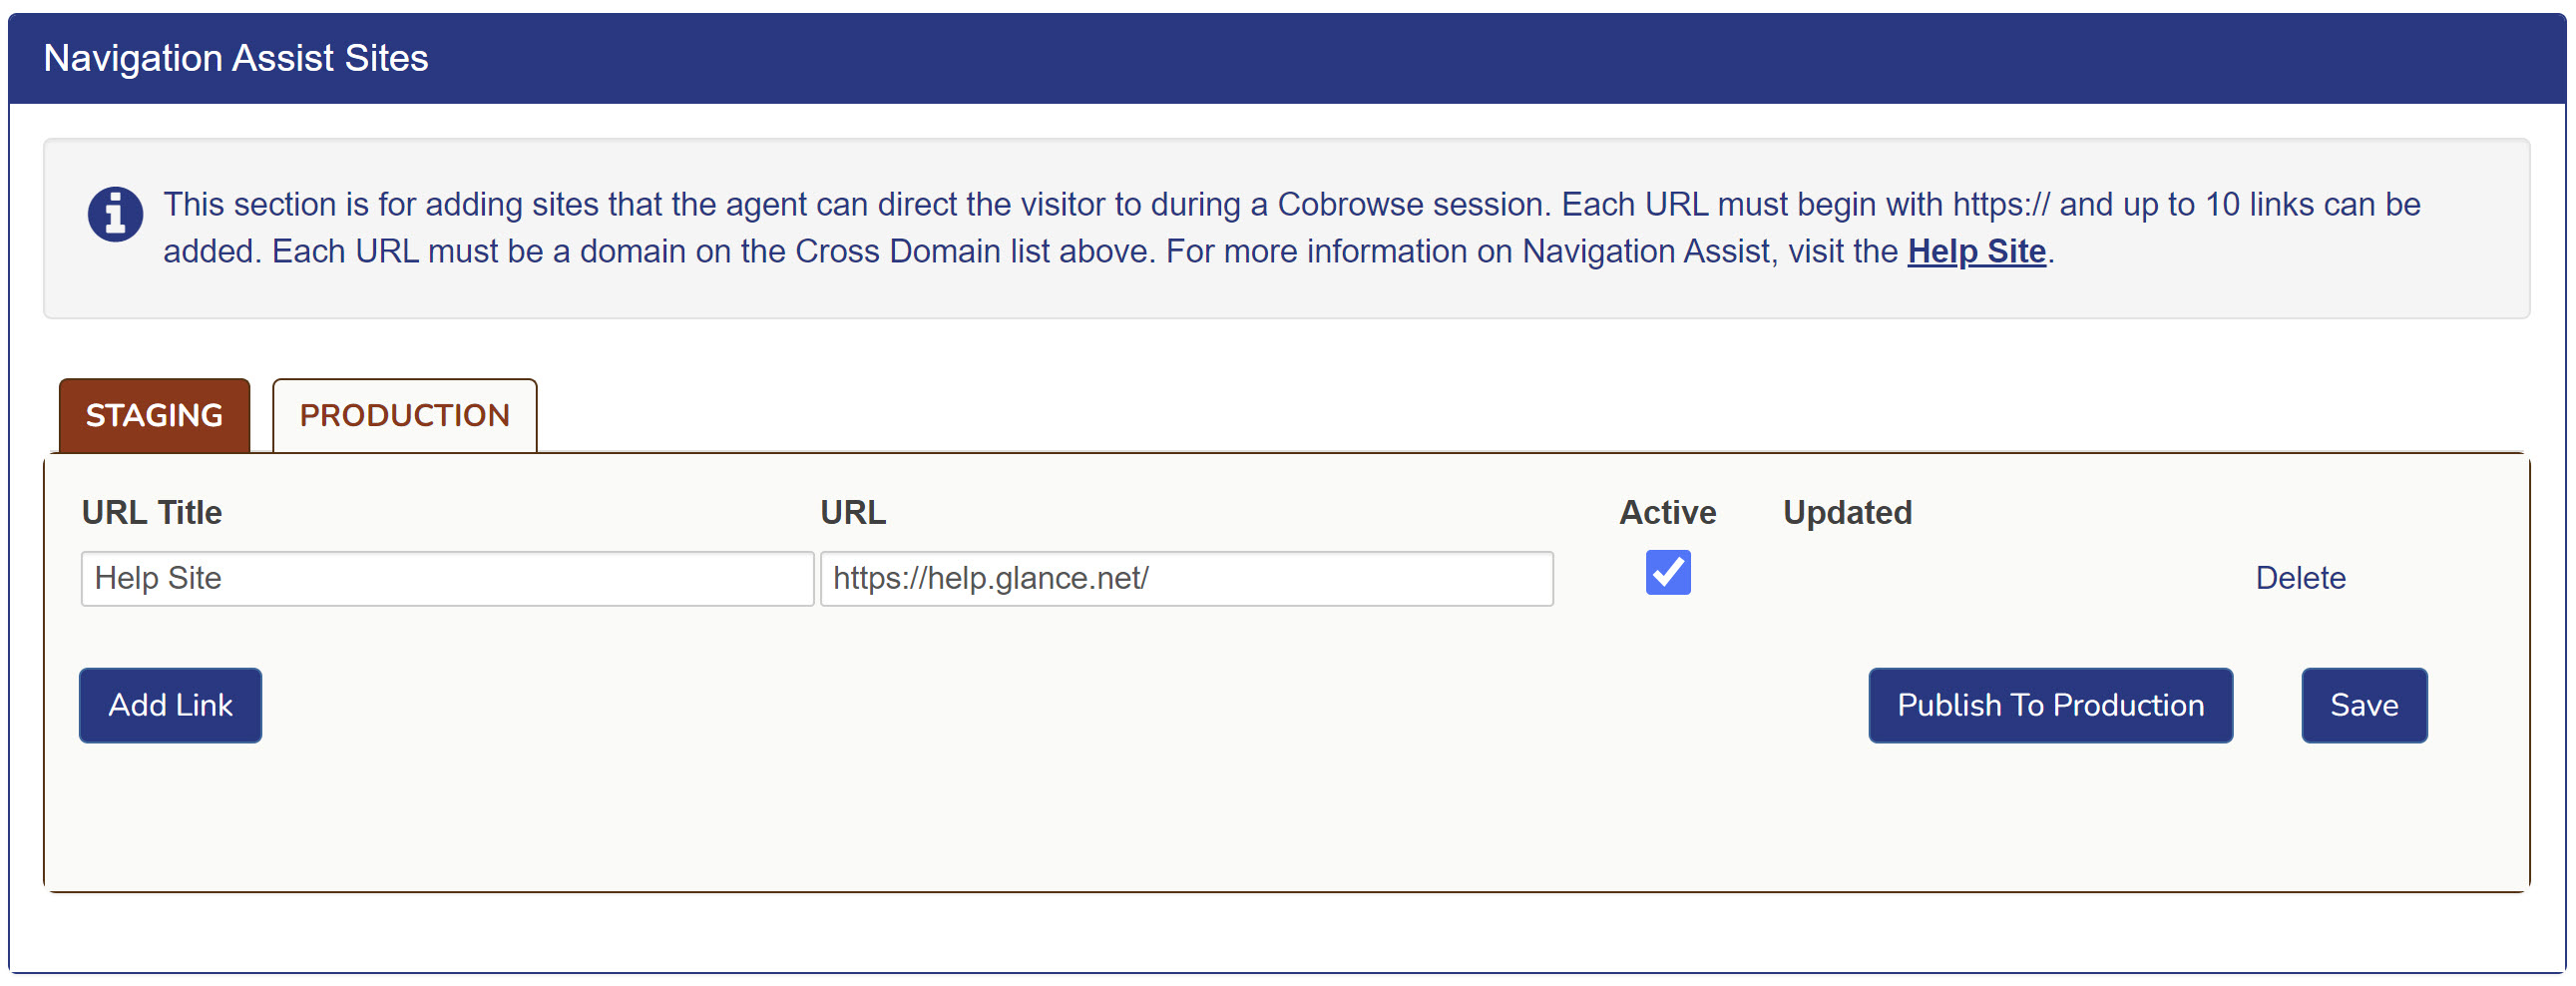
- Input a URL Title, the URL of the website, and select the Active checkbox.

NOTE: The site must be tagged with the Cobrowse script tag and may need to be added to the Cross Domain Cobrowse section if it is on a new domain. Refer to Cobrowse Cross-Domain for more information.
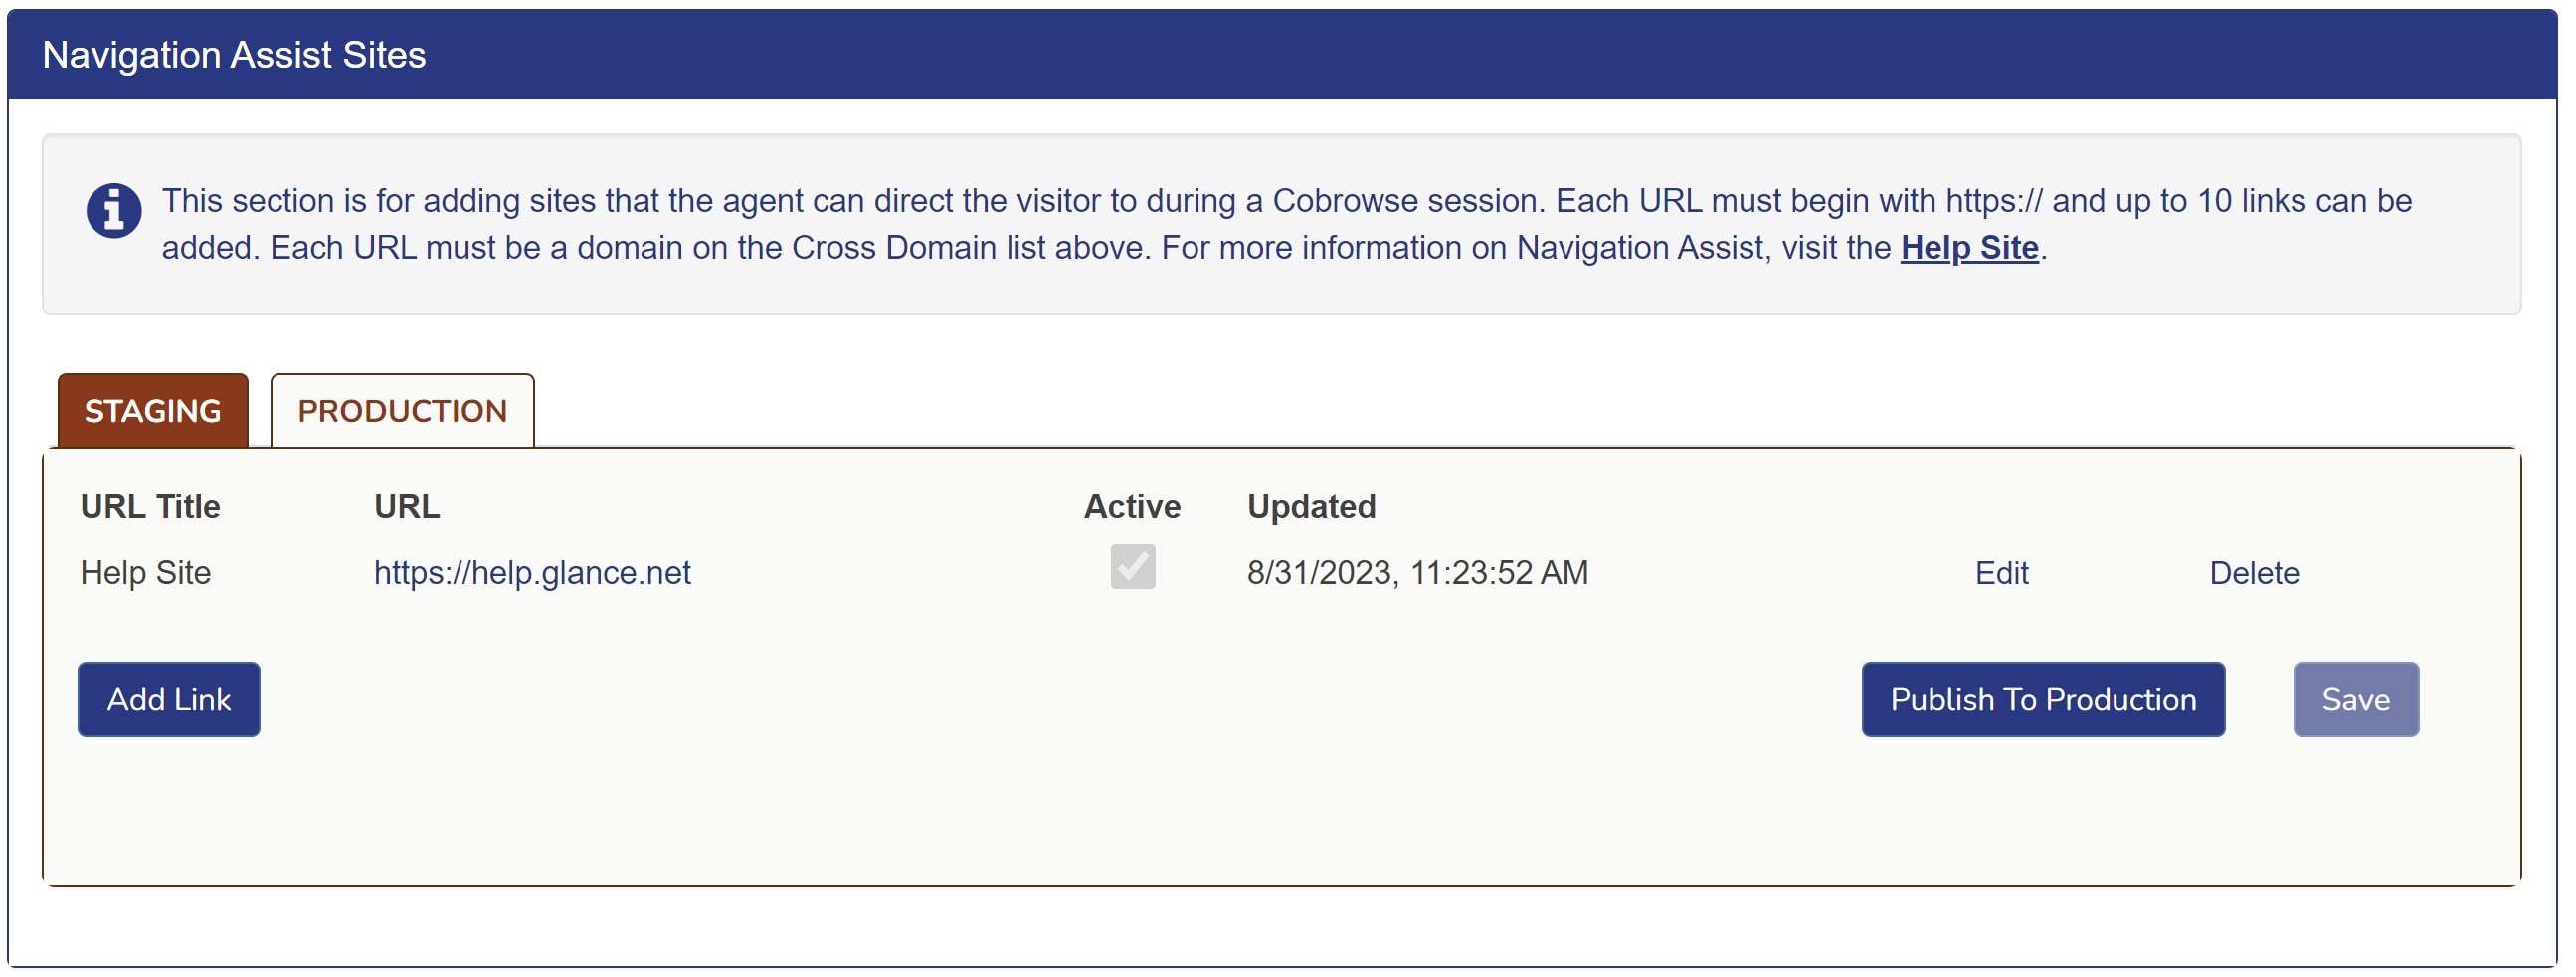
- Click Save then click Publish to Production.

Activate Navigation Assist During Cobrowse
- During a Cobrowse session, click on the folder icon to the left of the URL.

- Select a site to navigate to from the dropdown list.

- The visitor will see a modal asking for them to accept the navigation to the new site.

- The visitor will be redirected to the new site after clicking Accept.


