
Manage Users
Managing Users
Through the Glance Portal tab, you can add and edit users, create roles, and export user lists.
For Cobrowse, you can also use Glance's APIs found under Customizing for partner user registration to subscribe roles, show, update, delete, and add users.
Add Users to Your Account
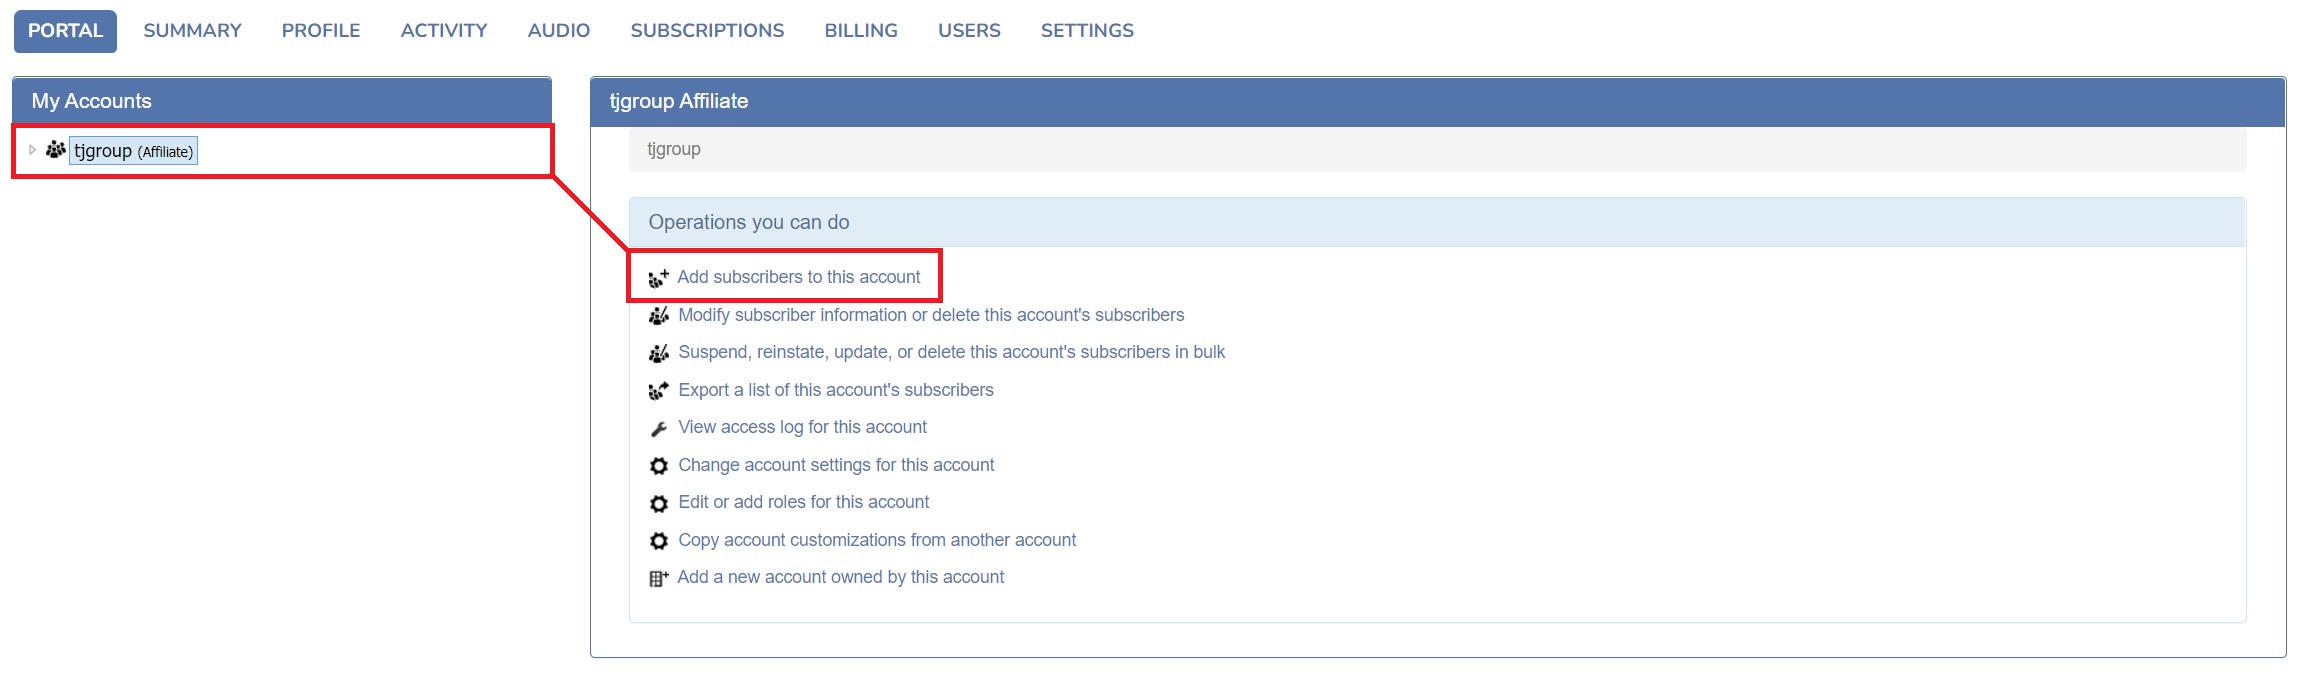
To add users to your account:
-
Under Account Management, select the Portal tab.

-
Select Add subscribers to this account.
-
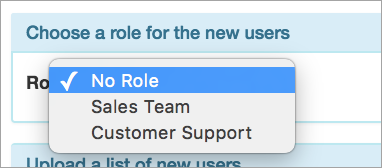
If using roles, select the role which is applicable.
There are two ways you can add users:
- Bulk Upload: If you are adding more than five users, we recommend a bulk upload via a CSV file. You may only select one role per bulk upload.
- Create a new bulk upload excel file using the following template and upload it to Glance.
| FirstName | LastName | Phone | GlanceAddress | Password | PartnerUID | |
|---|---|---|---|---|---|---|

NOTE: The file must be saved as a CSV before uploading to Glance.
- Manual: Use this option when you are adding one to three users.

Glance Address Naming Conventions
Customers can choose any of the following standard Glance naming conventions, or create their own. For John Appleseed <customer>, the following would apply:
- ja.<customer>.glance.net
- john.appleseed.<customer>.glance.net
- appleseedj.<customer>.glance.net
- appleseed.<customer>.glance.net
- <customer>1.glance.net, <customer>2.glance.net, <customer>3.glance.net
Create Roles
Create roles so you can:
- Provide specific team members special access to Glance feature(s). First, create a role for the permission, and then provision users into this role.
- Run session activity reports on teams. You can create a role for a team and provision users into this role.
Follow these steps, to create roles:
- Verify the role exists. If it doesn't already exist, proceed to Step 2.
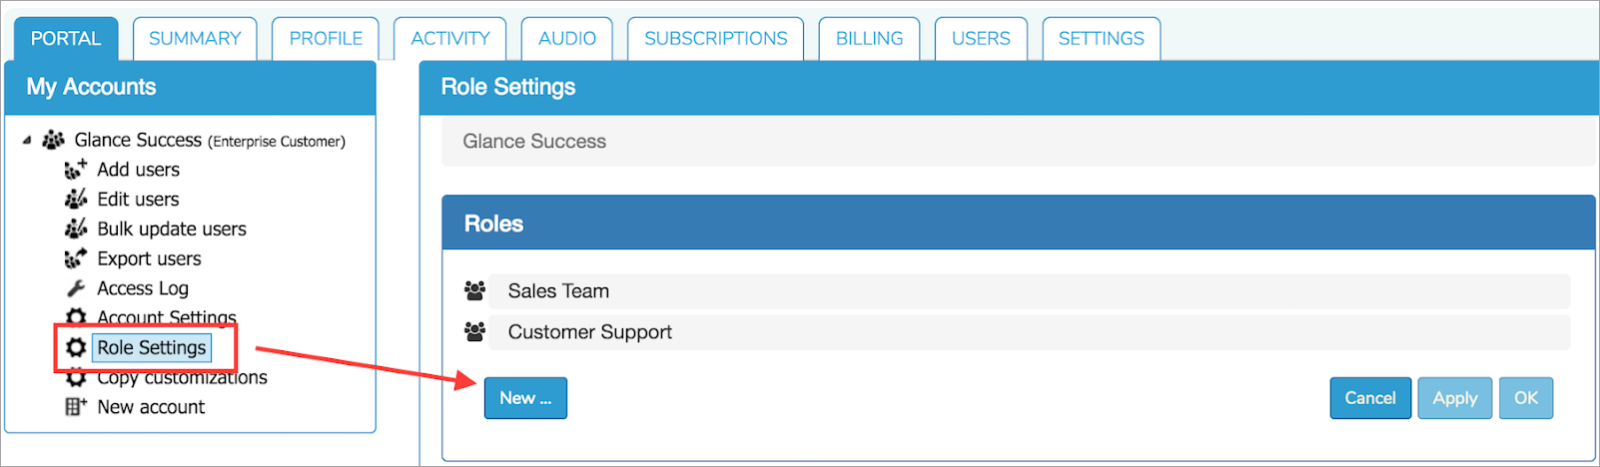
- To create a new role, select New.
- Fill out the following:
- Role name: Assign a name for the role.
- Description: Give a brief description which will be helpful for your team when reviewing the role.
- Features / Settings: Assign the capabilities and features for this role. The features/settings are pulled from the Settings tab found under the User Privileges and Settings section.
- Save the role.
- Click OK.
- If you have no other roles to create, click Apply.

NOTE: If you do not select Apply, the role will not be saved.

Password Requirements
The following password requirement settings apply to the passwords used to log into Glance from the Glance Client or website. They are only enforced when users create new passwords or change existing passwords. They do not apply to:
- Session Keys
- Login Keys
- API Keys
To set password requirements:
- Under Account Management, select the Settings tab.
- For Password Requirement choose one of the following:
- 6-character minimum length (not secure)
- 7-character minimum, with uppercase, lowercase, and digits
- 8-character minimum
- 8-character minimum, with uppercase, lowercase, and digit characters
- 8-character minimum, with one or more non-alphanumeric characters
- 9-character minimum
- 9-character minimum, with uppercase, lowercase, and digit characters
- 9-character minimum, with one or more non-alphanumeric characters
- For When users change passwords, choose one of the following:
- Use the present system default: allow reusing the current password
- Require a new password
- Allow reusing the current password
If you are using a single sign-on application to access Glance:
- To prevent your users from creating passwords so they can only authenticate via single sign-on, select may not create their own passwords.
- To allow your users to create passwords using the password reset page to authenticate into Glance from both a username and password or single sign-on, select may create their own passwords.
NOTE: This setting does not apply to subscribers who already have a password assigned.
Edit User Details Within Your Account
Follow the steps below to edit contact details, update Glance usernames, passwords, PUIDs, and roles.
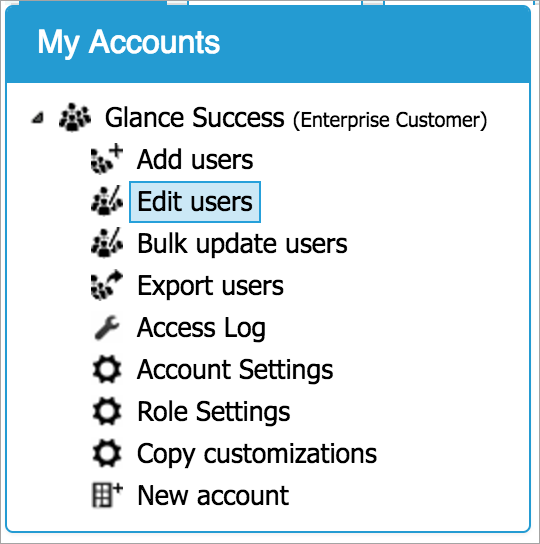
- Go to the Portal tab.
- Select your company name.
- Choose Edit users.
- Find the user you wish to modify and click the green Edit Users icon.

- The Edit a Subscriber window opens, where you can make changes to the user's information.
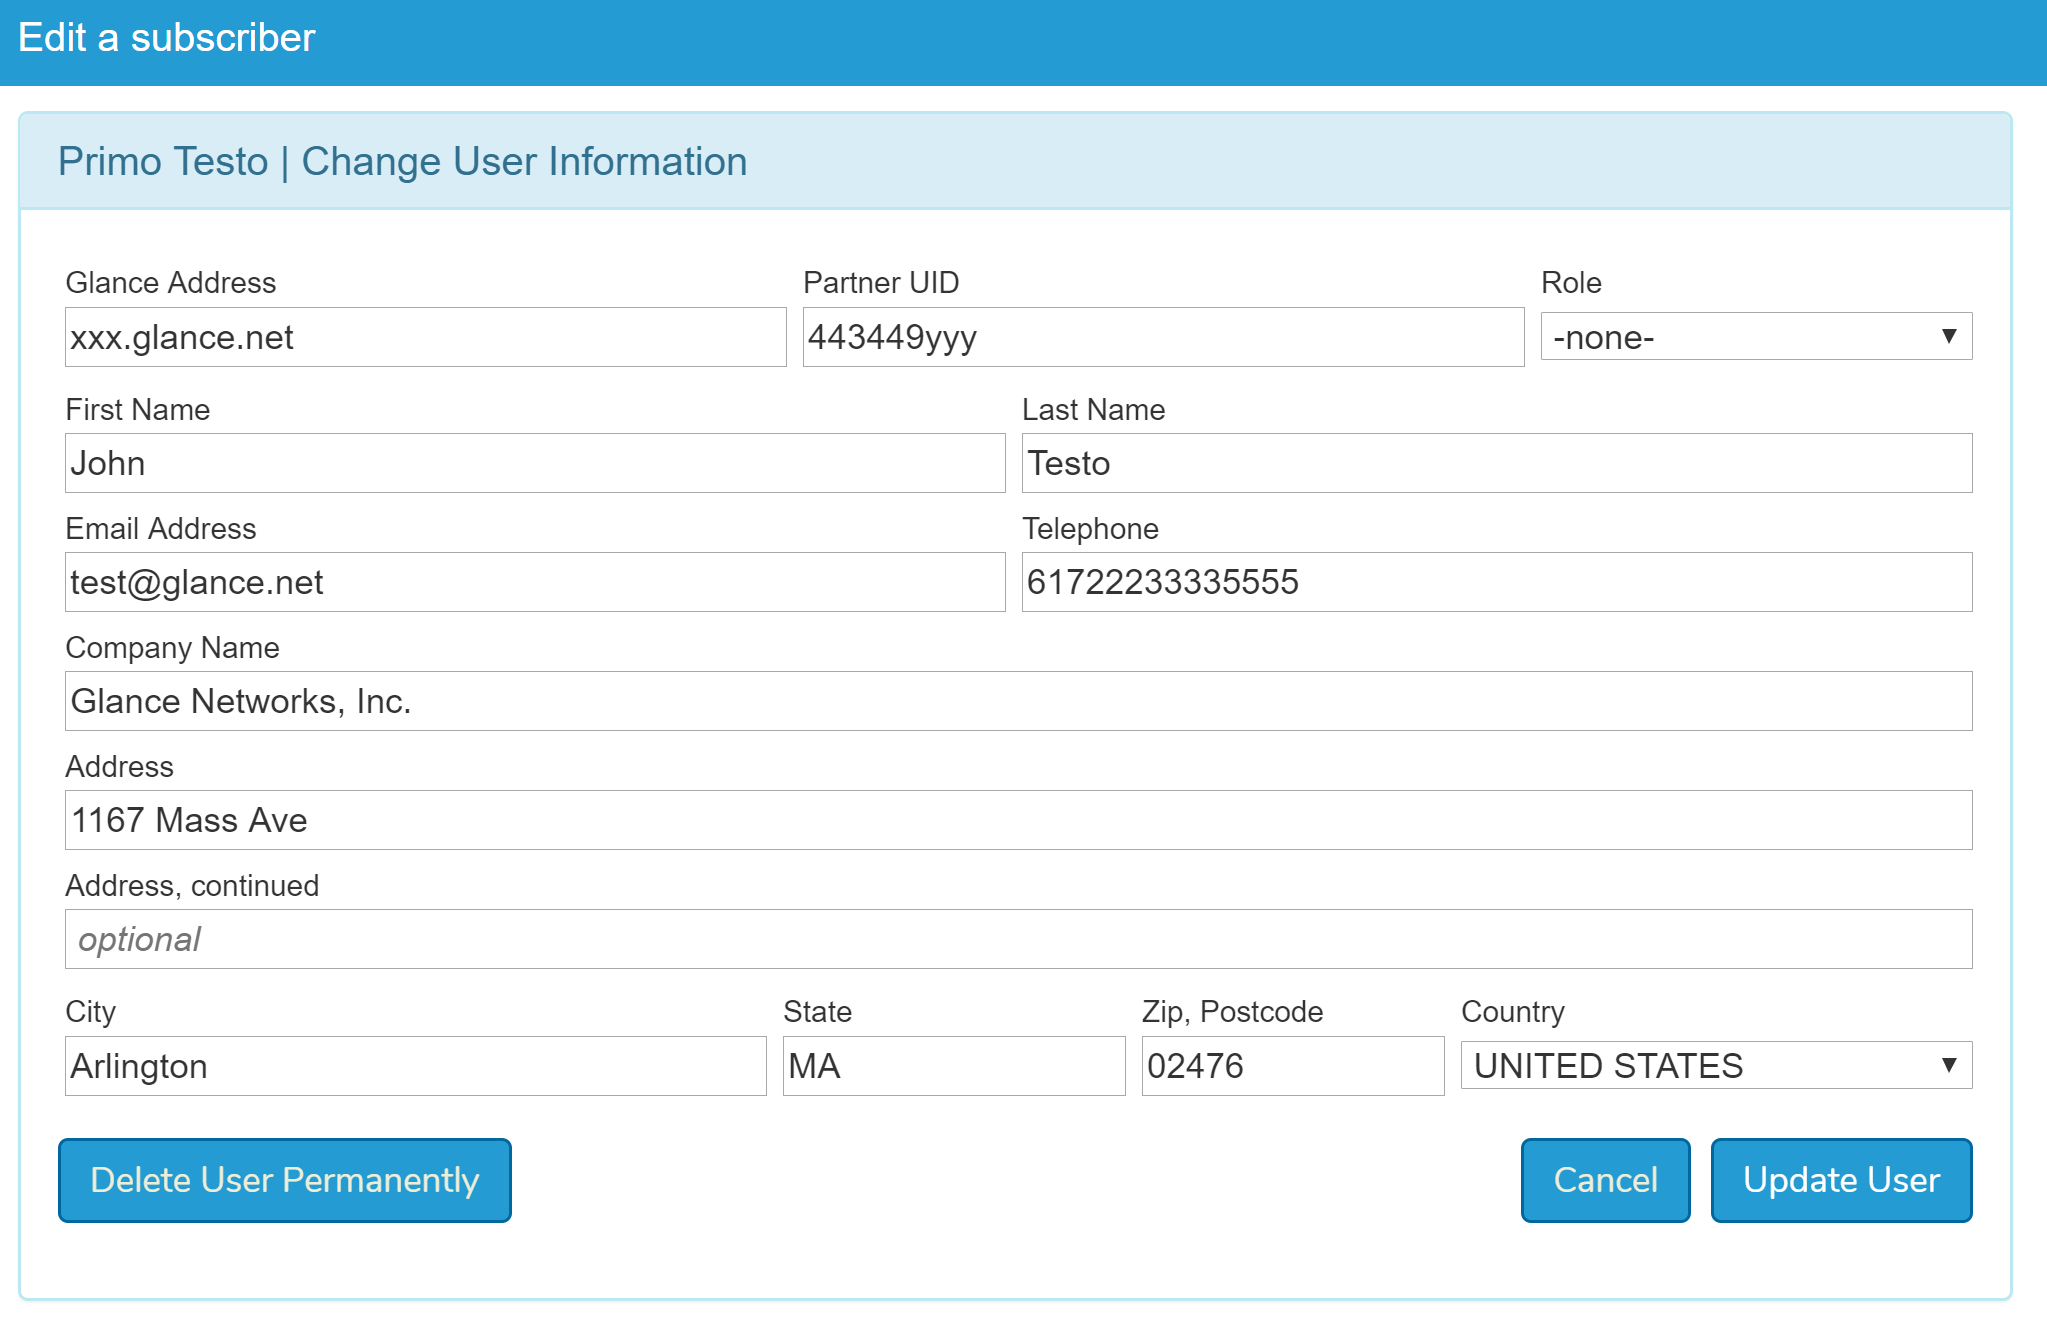
- After you make a change, click Update User to save.


NOTE: To prevent agents from being able to change their own Glance address, update the setting found within the Settings tab.
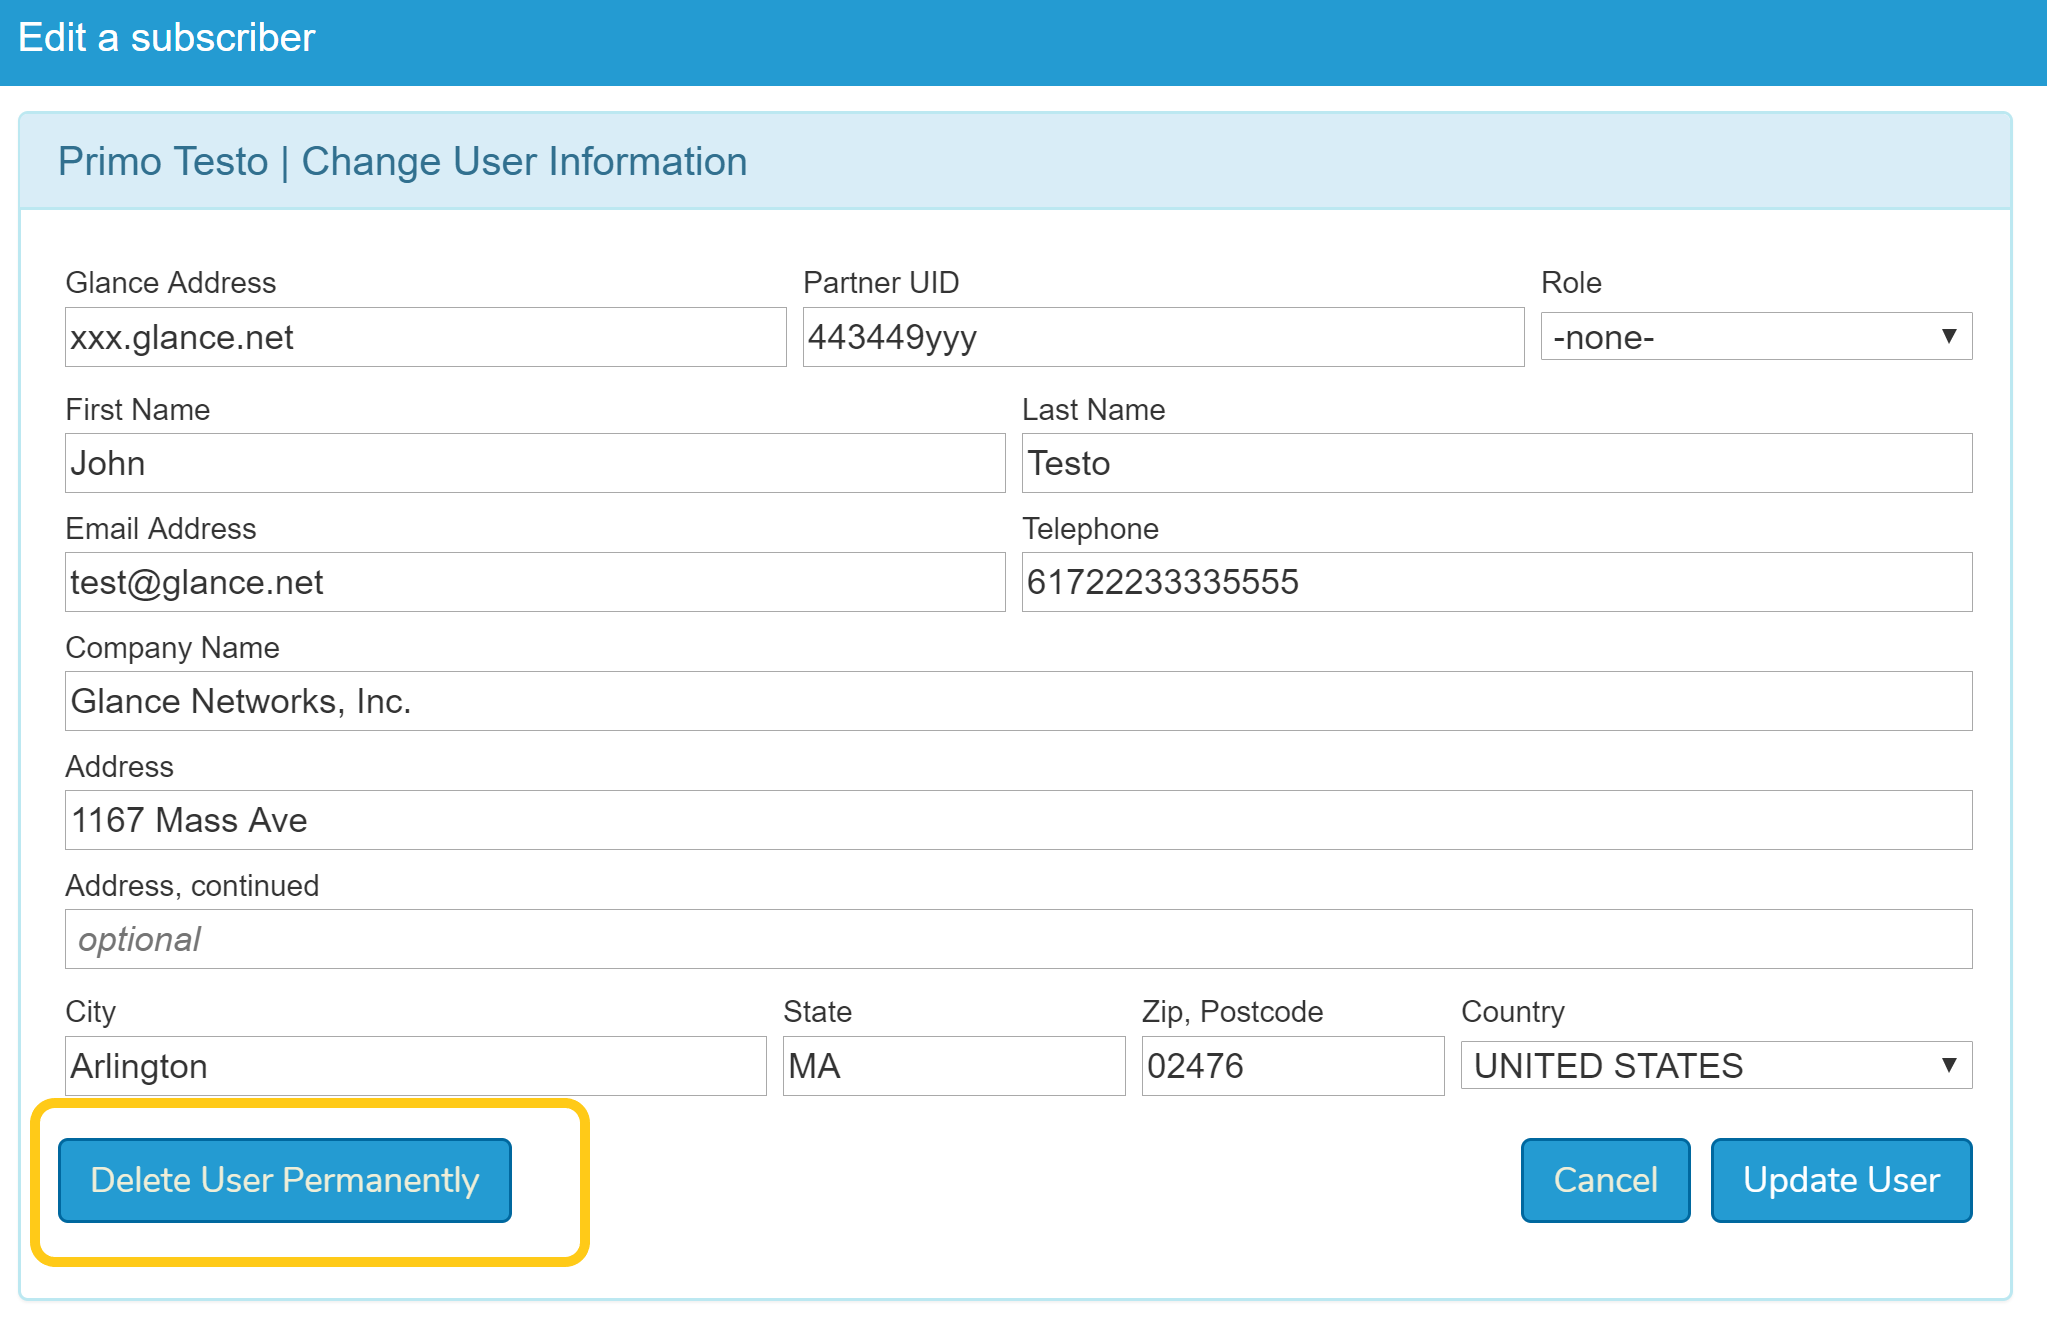
Delete a Single User Within Your Account
- Go to the Portal tab.
- Select your company name.
- Choose Edit users.
- Find the user you wish to delete, and click the green Edit Users icon.
- From the Edit a Subscriber window, click Delete User Permanently.

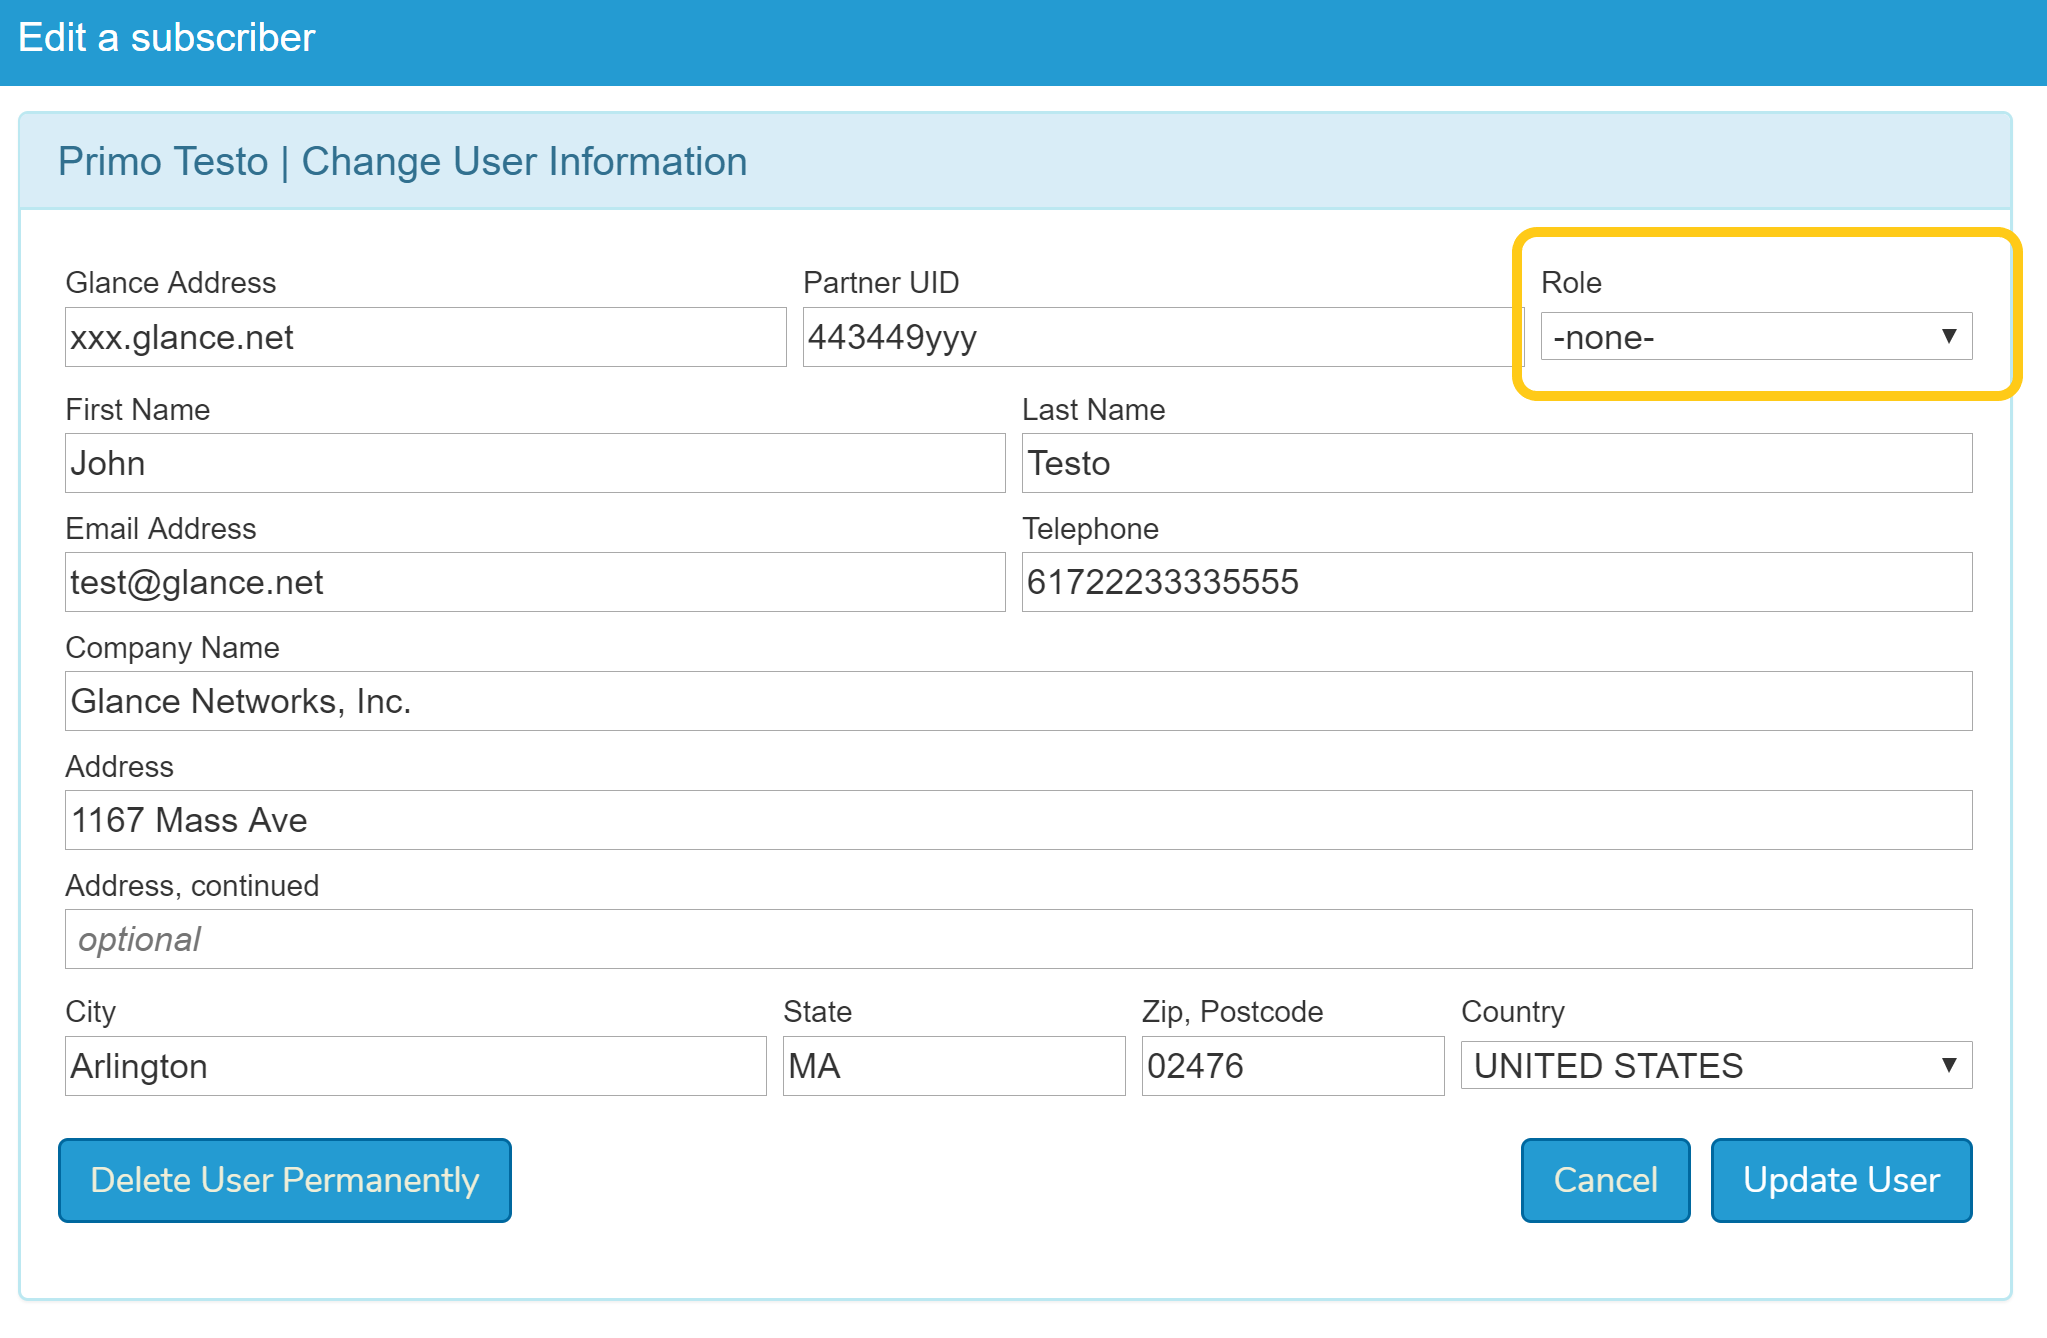
Edit a User Role Within Your Account
Follow these steps if you want to update a single user's assigned role:
- Go to the Portal tab.
- Select your company name.
- Choose Edit users.
- Locate the user you want to edit.
- Click on the green Edit Users icon.
- Select the new role and click Update User.

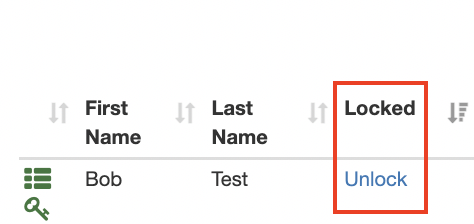
Managing Locked Out Users
Glance provides the ability for administrators to unlock users if they are locked out due to too many failed password attempts.
- Go to the Portal Tab> Edit Users.
- From the Users table, the Locked column will indicate if there are any locked out users. You can also sort this column by locked out users.
- To unlock a user, click the Unlock link> OK.
- The user is able to log in again.

Edit Users in Bulk Within Your Account (Customer View)
The following steps walk you through editing (Role, Passwords, Suspend, Delete, and Reinstate) for multiple users.
- Go to the Portal tab.
- Select Bulk update users.
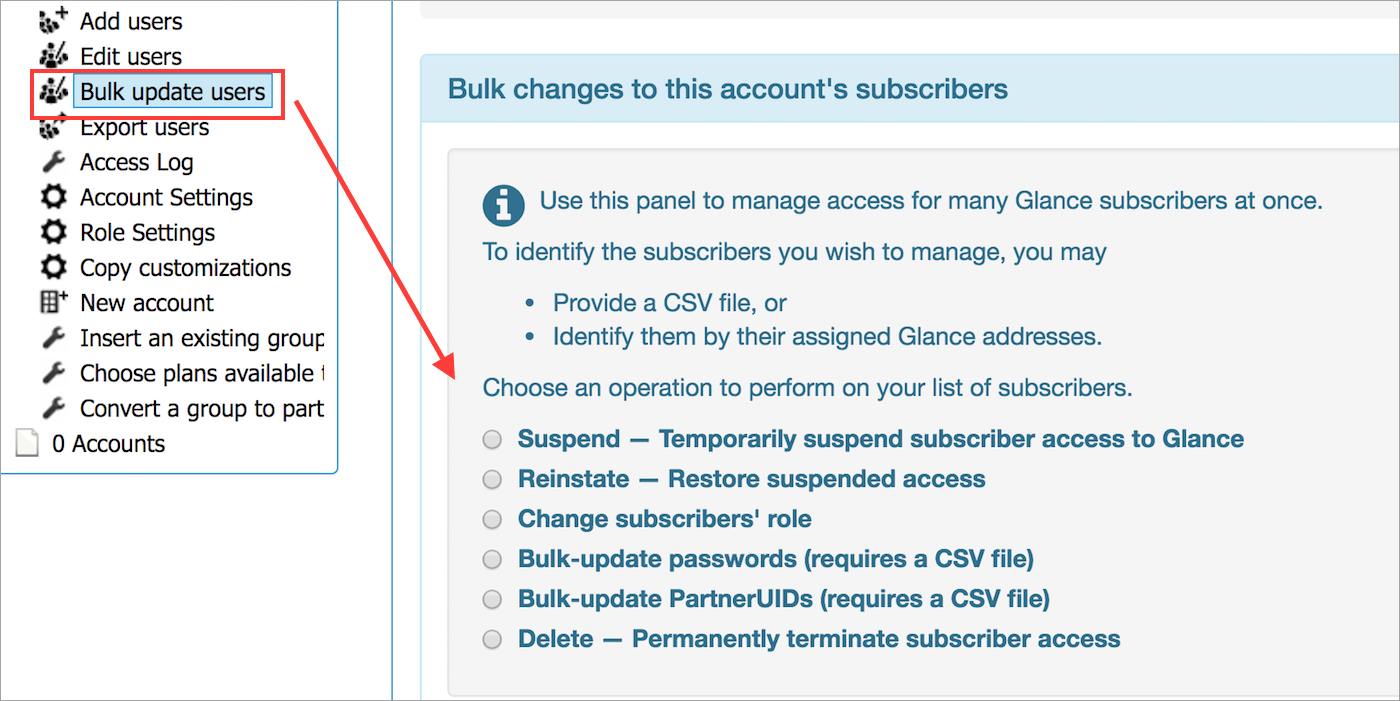
- Select a method:
- Suspend
- Reinstate
- Change subscriber's role
- Password
- PUID
- Delete
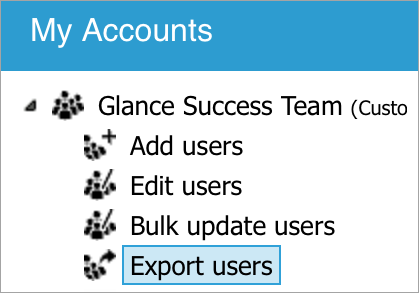
Export User Lists
To export user lists, follow these steps:
- Select Export users.
- Select which user list you want to export:
- All subscribers
- Active subscribers
- Suspended subscribers
- Click Export.
The list will be saved in your download folder.