
Enabling Voice
1. Install TwilioVoice framework
To be able to enable voice in Glance_iOS, we need to install TwilioVoice framework first.
Cocoapods
Add TwilioVoice framework into your Podfile:
pod 'TwilioVoice'
Run pod_install in your terminal:
pod install
Manual
Download TwilioVoice from here.
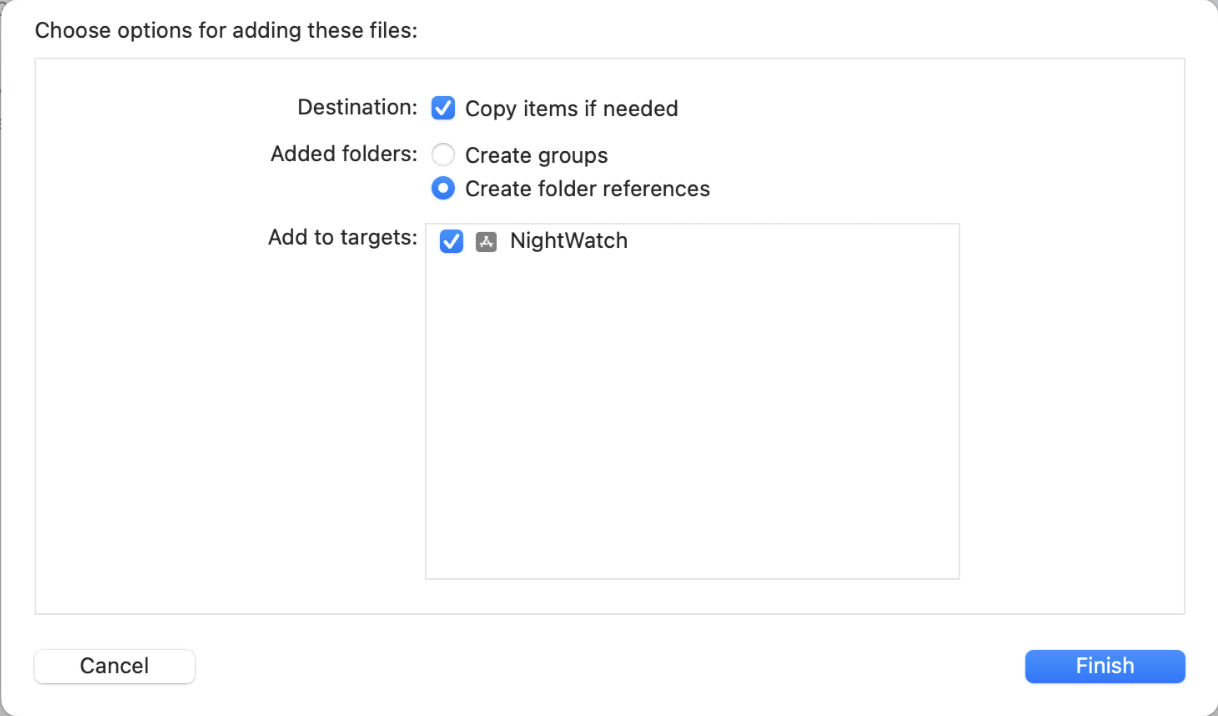
Drag the xcframework to your XCode project and select Copy items if needed.
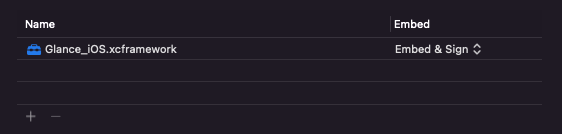
Make sure it was added to Frameworks and Libraries section in the General tab from your target Settings, don't forget to select the embed option Embed & Sign.
2. Enable microphone permission
Add Privacy - Microphone Usage Description to your Info.plist, you'll need this before starting any video calls with your agent:

3. Enabling voice
Instead of the startVideoCall method used in 2-Way Video section above, use the following:
GlanceVisitor.startVideoCall(GLANCE_SESSION_KEY, delegate: self, camera: "front", preferredSize: CGSize.init(width: 0, height: 0), framerate: 0, timeout: 0, termsUrl: "https://ww2.glance.net/" voiceGroupId: GLANCE_VOICE_GROUP_ID, voiceApiKey: GLANCE_VOICE_API_KEY, voiceParameters: nil, muted: false)
[GlanceVisitor startVideoCall:@"1234" delegate:self camera:@"front" preferredSize:CGSizeMake(0, 0) framerate:0 timeout:0 termsUrl:@"https://ww2.glance.net/" voiceGroupId:GLANCE_VOICE_GROUP_ID voiceApiKey:GLANCE_VOICE_API_KEY voiceParameters:nil muted:NO];
Glance Voice requires a voiceGroupId and voiceApiKey provided by Glance.
Now your video calls have voice enabled!