Two-Way video
Setup
Obtain Group ID from Glance
System Requirements
2-Way Video SDK supports devices with Android OS Version 5.1 (API Level 22) or higher. To check if a device is supported, you can use the following method:
Visitor.isVideoAvailable()
Visitor.isVideoAvailable()
Quick start
Clone this project and replace the GLANCE_GROUP_ID value with your Group ID obtained from Glance.
Installation
Framework
Download the Glance Android SDK (.aar file) or copy from this project
To include the AAR in the app, put it in the app/libs folder. Then modify the application’s build.gradle file to include the following just below "apply plugin: 'com.android.application'":
repositories {
    flatDir {
        dirs 'libs'
    }
}
Ensure multiDexEnabled is set to true within the android > defaultConfig section:
android {
    defaultConfig {
        minSdkVersion 19

        ...

        // Enabling multidex support.
        multiDexEnabled true
    }
    ...
}
Also add the following block within the android section:
compileOptions {
    sourceCompatibility JavaVersion.VERSION_1_8
    targetCompatibility JavaVersion.VERSION_1_8
}
And within the dependencies block of the build.gradle file, add the following:
implementation(name: 'glanceSDK', ext: 'aar')
implementation "org.java-websocket:Java-WebSocket:1.4.0"
implementation "androidx.lifecycle:lifecycle-extensions:2.2.0"
annotationProcessor "androidx.lifecycle:lifecycle-compiler:2.2.0"
Then, sync gradle by going to File -> Sync Project with Gradle Files or clicking the "Sync Now" button. Until you do this, Android Studio won’t be able to autocomplete or import the appropriate classes.
If you run into this error on app launch: java.lang.RuntimeException: Unable to instantiate application androidx.multidex.MultiDexApplication: java.lang.ClassNotFoundException, you'll need to include an additional dependency:
implementation 'androidx.multidex:multidex:2.0.1'
Configuration
Now that you have the Glance Video framework imported into your Android project and have obtained your Glance Group ID you can get start integrating the 2-Way Video SDK.
To start, initialize the Visitor class using your Glance Group ID. Pass a reference to your main activity and your Group ID as the second parameter. The token, name, email and phone fields are optional.
Visitor.init(this, GLANCE_GROUP_ID, "", "", "", "", "");
2-Way Video
In order to initiate a 2-Way Video Call, use the following:
Visitor.startVideoCall(sessionKey, camera, termsUrl);
Visitor.startVideoCall(sessionKey, camera, termsUrl);
This will show the default dialog provided by Glance. It can be fully customized (see "Customizing Colors & Images" below)
The first parameter is a session key you provide that the agent will use to connect after the user has initiated a 2-Way Video Call.
The camera parameter takes in either "front" or "back". The user's device will start 2-Way Video with the camera based on the value passed in here.
The termsUrl takes in a string to a Terms & Conditions URL of your choosing.
To use your own custom dialog, you can disable the one provided by Glance by setting the showDialog argument to false:
Visitor.startVideoCall(sessionKey, camera, termsUrl, showDialog);
Visitor.startVideoCall(sessionKey, camera, termsUrl, showDialog);
For more customization options regarding video, Glance provides the following method:
Visitor.startVideoCall(sessionKey, camera, preferredSizeWidth, preferredSizeHeight, framerate, timeout, termsUrl);
Visitor.startVideoCall(sessionKey, camera, preferredSizeWidth, preferredSizeHeight, framerate, timeout, termsUrl);
Which can also be used without the dialog provided by Glance (set showDialog to false):
Visitor.startVideoCall(sessionKey, camera, preferredSizeWidth, preferredSizeHeight, framerate, timeout, termsUrl, showDialog);
Visitor.startVideoCall(sessionKey, camera, preferredSizeWidth, preferredSizeHeight, framerate, timeout, termsUrl, showDialog);
Optimized Builds
The Glance AAR includes a binary build for each supported native architecture. The Glance library uses the Android NDK and requires native support for each platform.
The Glance AAR file includes the binaries for each architecture and is larger as a result. To create an optimized and much smaller APK that only includes the library binary for a single architecture you need to take advantage of APK splits.
Follow the APK splits documentation to create optimized APKs.
Advanced
Enable Glance Voice
- Add the Twilio Programmable Voice SDK (v5.4.0) to your project gradle file, along with the following network dependencies that are required:
implementation 'com.twilio:voice-android:5.4.0'
implementation 'com.squareup.retrofit2:retrofit:2.3.0'
implementation 'com.squareup.retrofit2:converter-gson:2.3.0'
- Enable microphone permissions in your application. For more information, see Twilio documentation.
- Add this line to your Android Manifest file:
<uses-permission android:name="android.permission.RECORD_AUDIO"/> - Request microphone permissions within your application:
String[] permissions = {Manifest.permission.RECORD_AUDIO};requestPermissions(permissions, 1);
Then, instead of the startVideoCall method used in 2-Way Video section above, use the following:
Visitor.startVideoCall(sessionKey, camera, preferredSizeWidth, preferredSizeHeight, framerate, timeout, termsUrl, voiceGroupId, voiceApiKey, voiceParameters, voiceMuted);
Visitor.startVideoCall(sessionKey, camera, preferredSizeWidth, preferredSizeHeight, framerate, timeout, termsUrl, voiceGroupId, voiceApiKey, voiceParameters, voiceMuted);
Glance Voice requires a voice group ID and voice api key provided by Glance.
Customizing Colors & Images
-
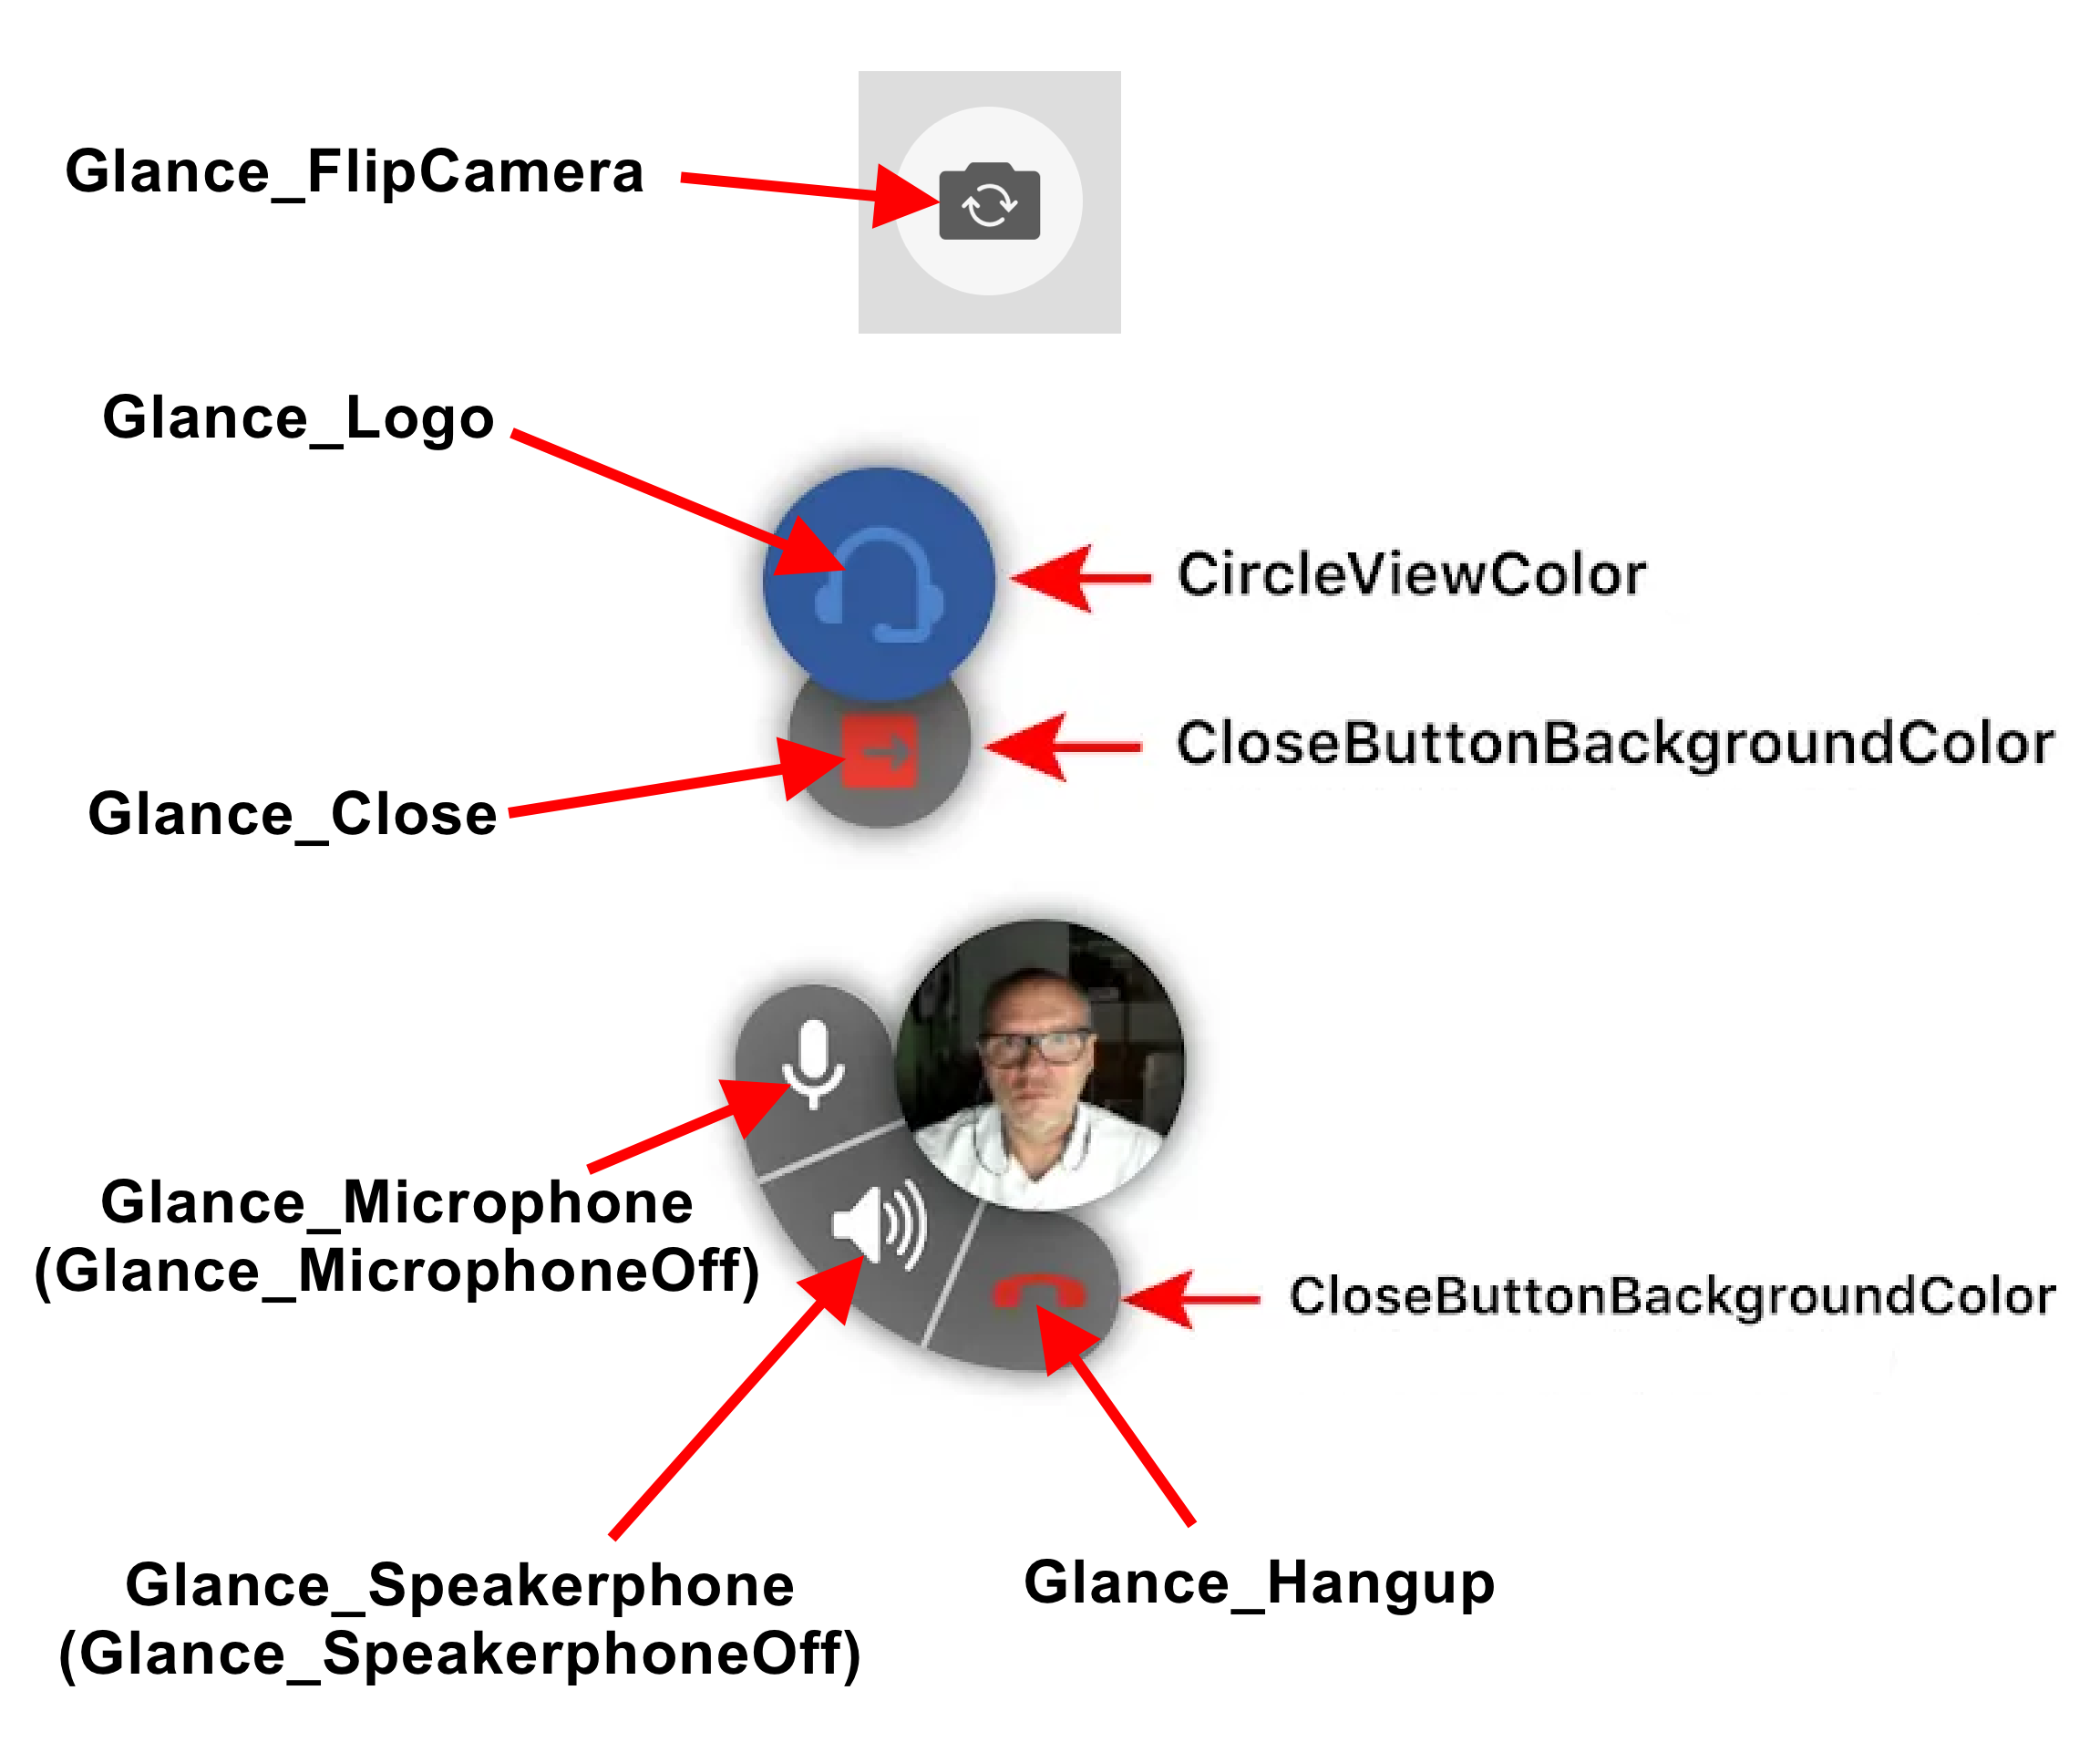
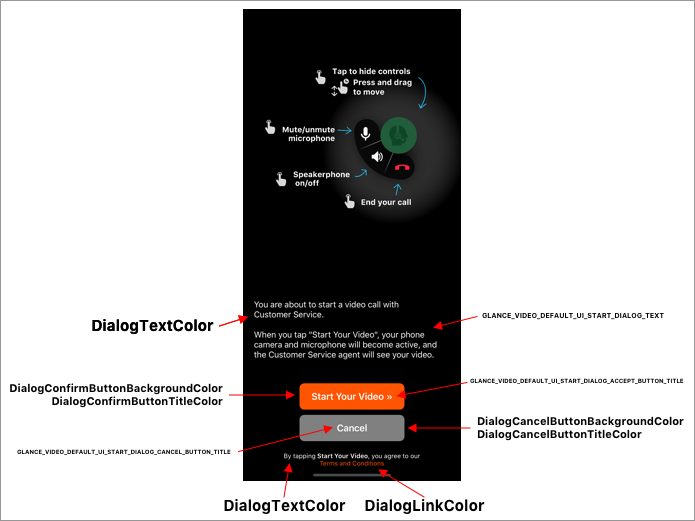
To set various colors used by the default UI, add them to your res/values/colors.xml file, using constants found in the images below.
-
To modify the UI text, update your application’s res/values/strings.xml file, using constants found in the images below.
-
To override images, add your custom images (SVG format) to the res/drawable folder by right clicking on drawable and selecting New > Vector Asset. Name the image using the constants in the image below:


Support
Email mobilesupport@glance.net with any questions.

